Samstag, 27. April 2024

Practice game Infanterie Block of the Hundred Kingdoms against Dweghom

A few weeks ago, we attended the game day in Hildesheim, and as usual, I had packed my brave people with sticks.

Hundred Kingdoms [2000/2000] Relentless Drill

== (Warlord) Imperial Officer [130]: Armor of Dominion, Brace for Impact, On Your Feet
• Mercenary Crossbowmen (3) [105]:
• Men at Arms (3) [105]:
• Steel Legion (4) [245]: Standard Bearer, Drillmaster
• Gilded Legion (9) [445]: Standard Bearer, Drillmaster

== (Warlord) Noble Lord [110]: Front Line Tactician
• Household Guard (9) [405]: Standard Bearer, Armsmaster
• Mercenary Crossbowmen (3) [105]:
• Longbowmen (4) [175]:

While Mass and Benjamin are currently focusing and playing with large infantry blocks in Discord, I decided to test a similar list again. Since I only own 9 stands of Gilded Legion and do not plan to acquire more, I have slightly adjusted one of my old lists. I played a similar one more frequently in mid-2023, but the enjoyment of large blocks quickly faded, especially when faced with heavy shooting or magic. With Movement 5 and no further tricks, you quickly fall behind, especially when you have no additional protection available. D3 R3 simply melts too easily. Therefore, I packed regiments in the army that could inflict damage from a distance. Knights would be more sensible, but I consciously decided against them and instead relied on solid shooting to force my opponent to run into my blocks. The theme was ultimately to field a pure infantry army, and depending on my positioning, the longbows could continue to fire with Arcing Fire. Plus, I just like longbows, and with only 10 cards, there are also fewer wasted activations.

Dweghom [1995/2000]

== (Warlord) Tempered Sorcerer [155]: Fire School, Focused
• Fireforged (3) [180]: <--Warlord
• Inferno Automata (3) [180]:

== Tempered Sorcerer [130]: Fire School
• Hold Ballistae (5) [230]: Standard Bearer <--Sorcerer
• Hellbringer Drake (1) [200]:

== Hold Raegh [140]: Draegbhrud
• Initiates (4) [190]:
• Dragonslayers (3) [240]: Standard Bearer Sorcerer
• Ironclad Drake (1) [220]:
• Hold Warriors (3) [130]:

This didn't match what was currently usual for us or in Lübeck, but here we wanted to test a few things. To avoid associating positive thoughts with Dweghom, the double Fire Sorcerer was added as well. Originally, Raegh was supposed to go into the Initiates, but after rolling the "Melee" scenario, Raegh preferred to go into the Dragonslayer. Melee wasn't ideal for my list against Dweghom because I had to give up the points for the Warlord twice and only had four scoring units. Therefore, the movement had to be right. At least my list doesn't have to roll for Heavys or Mediums, and I hoped his regiments wouldn't come onto the board optimally.

In round one, we both received all Lights and advanced. First, a few crossbows ran into the forest, and later I decided to place one unit of Longbows on each side. Since I wanted to score with the Man at Arms in the next round, a regiment of Longbows was allowed to move 18 inches.


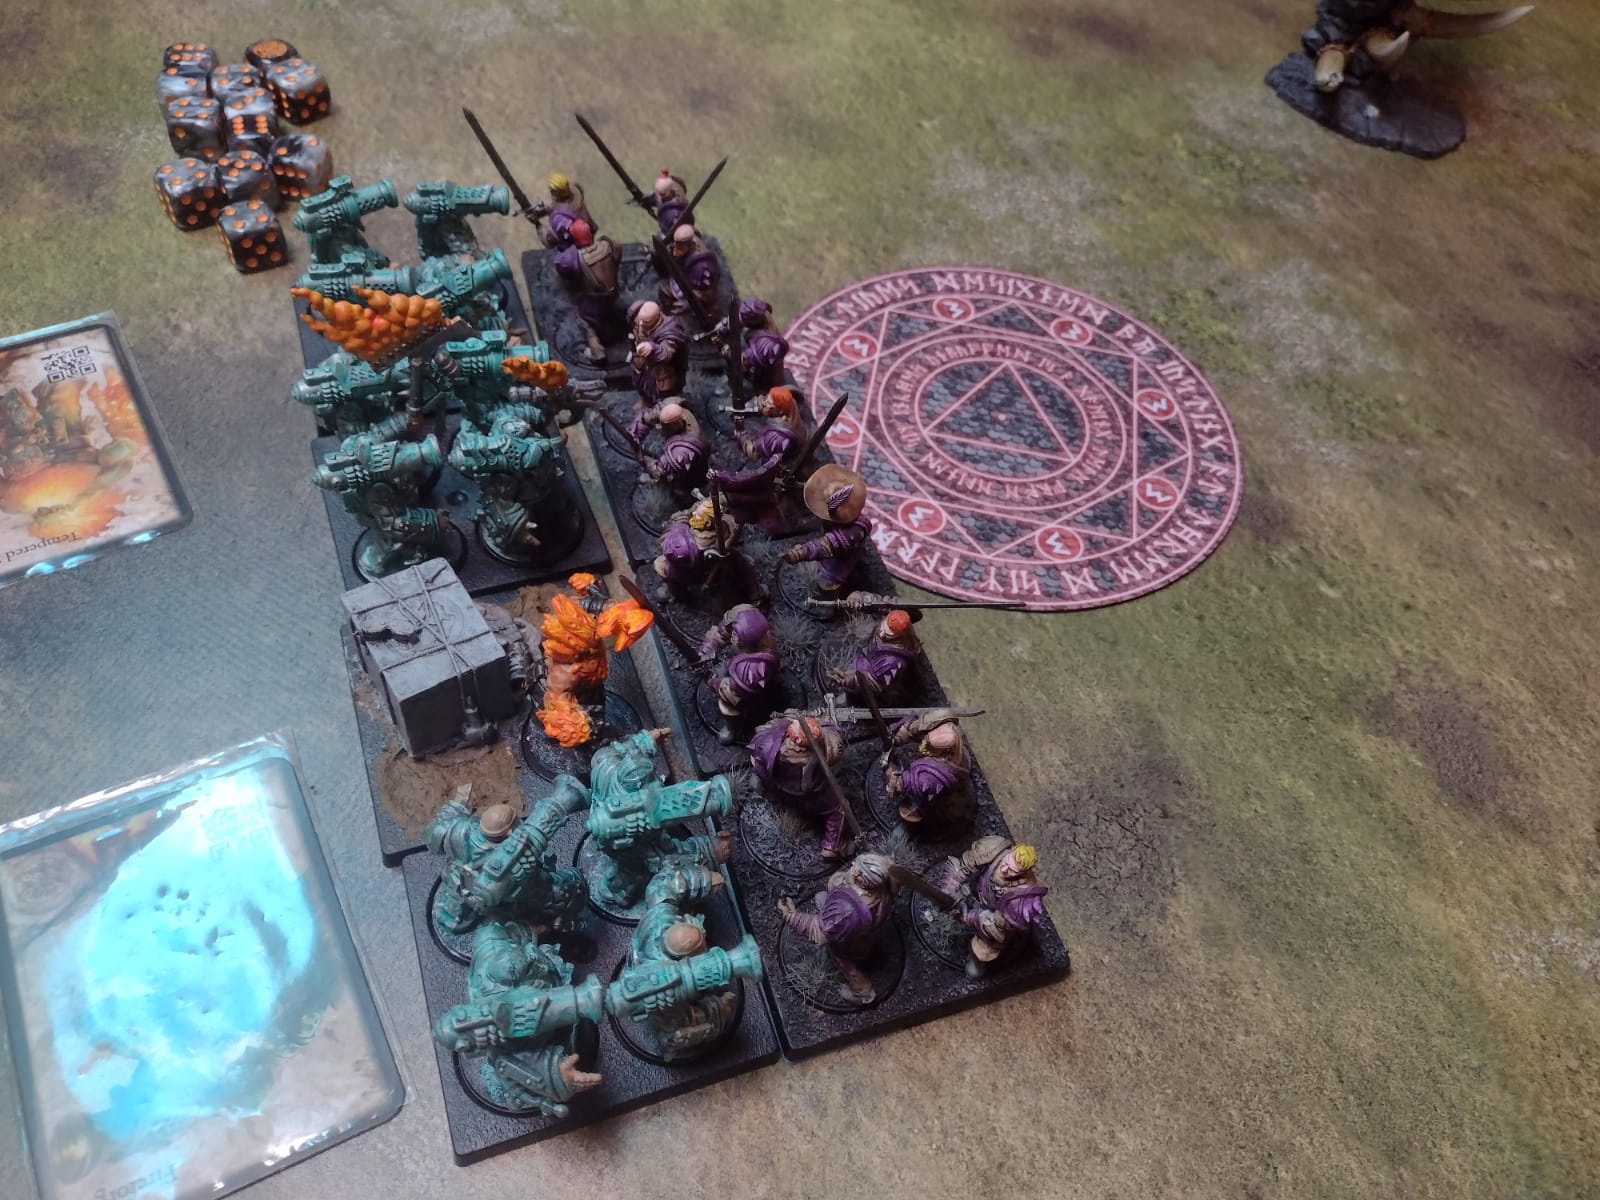
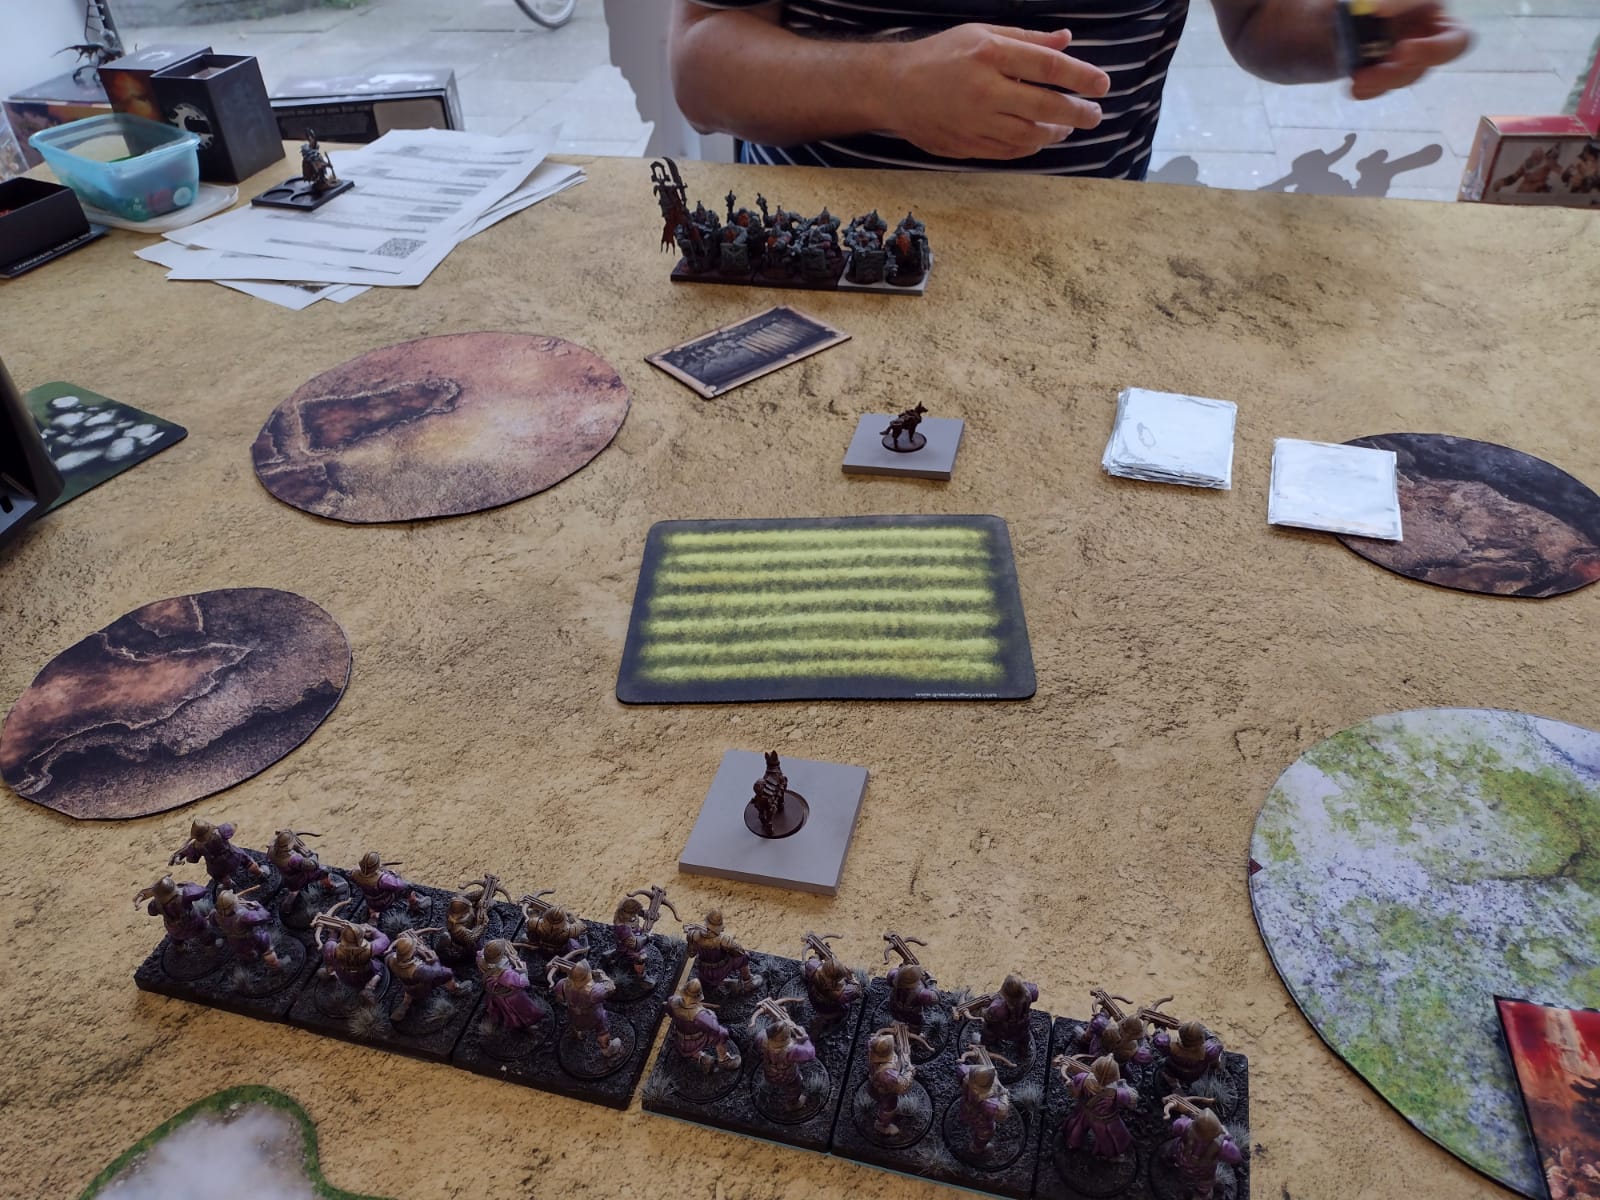
In round two, we both received all Mediums. I found this a bit unfair and particularly problematic. With 7:8 cards, I wanted my army to be on the side where there were no mages, but if I placed myself on the right now, there were also dragons and company, or vice versa. Therefore, I decided to place the two melee regiments and the Noble Lord at the top, followed by my shooters. I could have easily scored in the left large and small zones without cover, but 9 stands hardly ever benefited from cover anyway. Perhaps I could build up enough lead this way. Additionally, my regiments on the right side were clearly in my way. So that's what I did and stayed just out of shooting range. Then the Drake and the Sorcerer Warlord marched far to the left, and only a few Warriors and Initiates on the other flank. There were also Automata, but they clearly dared to come too close and made an unpleasant acquaintance with the longbows and crossbows. Score: 7:0.


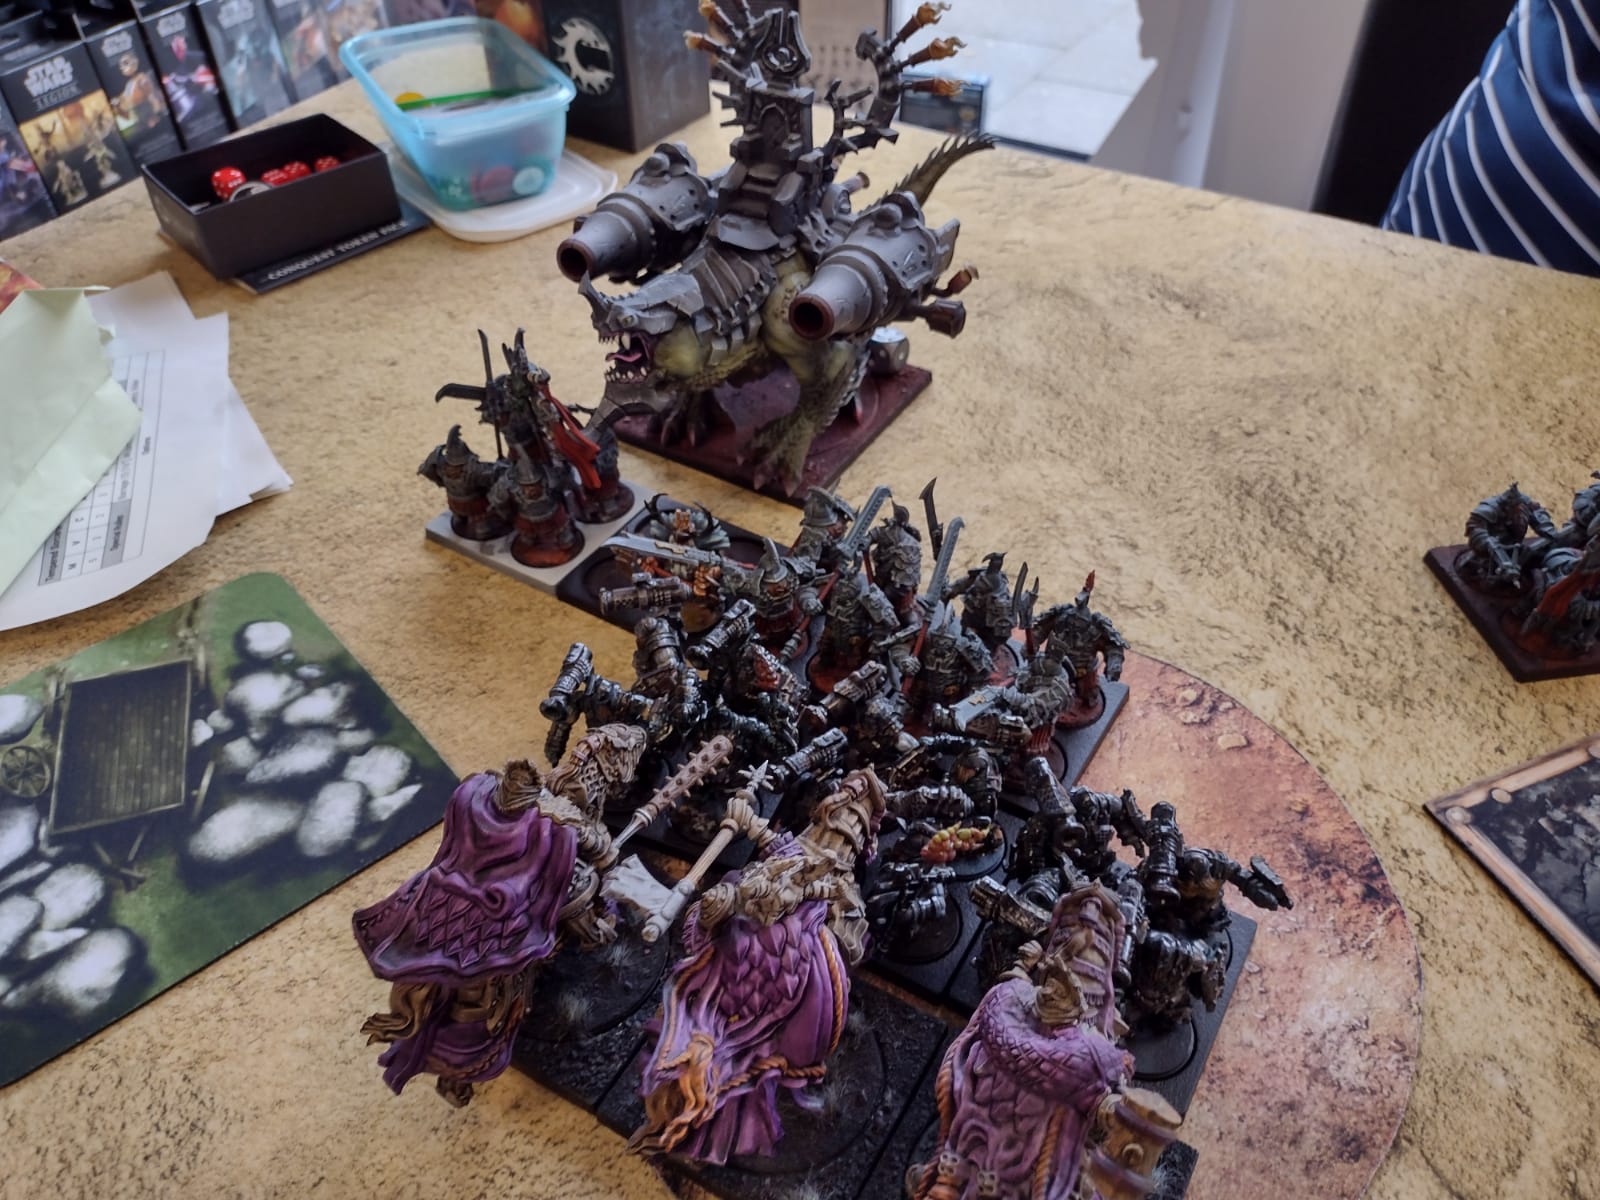
In round three, we both received all Regiments again. What was the point of paying for Flank if my opponent got it anyway? This made Uziel always feel like he was with the Nords. Oh well. Besides obvious things like longbows shooting down the Automata, there weren't many useful things to do. Saving the other longbows and the Man at Arms would have been something, but otherwise, I couldn't think of anything. The large Household Guard block wanted to move forward as late as possible to receive as little damage from the shooting and none from the fire magic. What I hadn't quite expected was that the Fireforged marched forward first by 10 inches so the Warlord could burn away my Man at Arms and the toad could waddle into the zone. Not bad at all; it could then farm three points for the rest of the game. Maybe the left longbows could shoot them down. Before I got that far, though, the longbows shot down two stands of Ballista and the others took out the Automata, although both regiments were already weakened from the longbows in the previous round. Then there were the Gilded Legion in the center and the Steel Legion on the right. Opposite them was the Ironclad, which didn't look like a toad due to the lack of cannons. Maybe the Gilded Legion could run it, but I didn't have high hopes for that. Otherwise, the Initiates cheerfully marched forward to secure the right flank. Finally, just before my turn, the Ballista arrived. The shooting raining down on the Guard wasn't actually that bad, but still, six wounds. Therefore, and because there was a Sorcerer Warlord there, I briefly considered pulling back the Guard, but at that moment, Nino came to the table and quoted Honecker, so I bravely threw myself into the meat grinder: Forward always, backward never! Score: 11:9.


In round four, I wanted to start doing something, so the Guard was positioned at the top. Above them was the Noble Lord, in case I didn't start first, and of course, I didn't. Sorcerer Warlord, two fire spells, and then the Fireforged as a follow-up activation. Six stands just died. It was sickening, but I activated the Lord, gathered his two stands, and then charged into the Ballista.


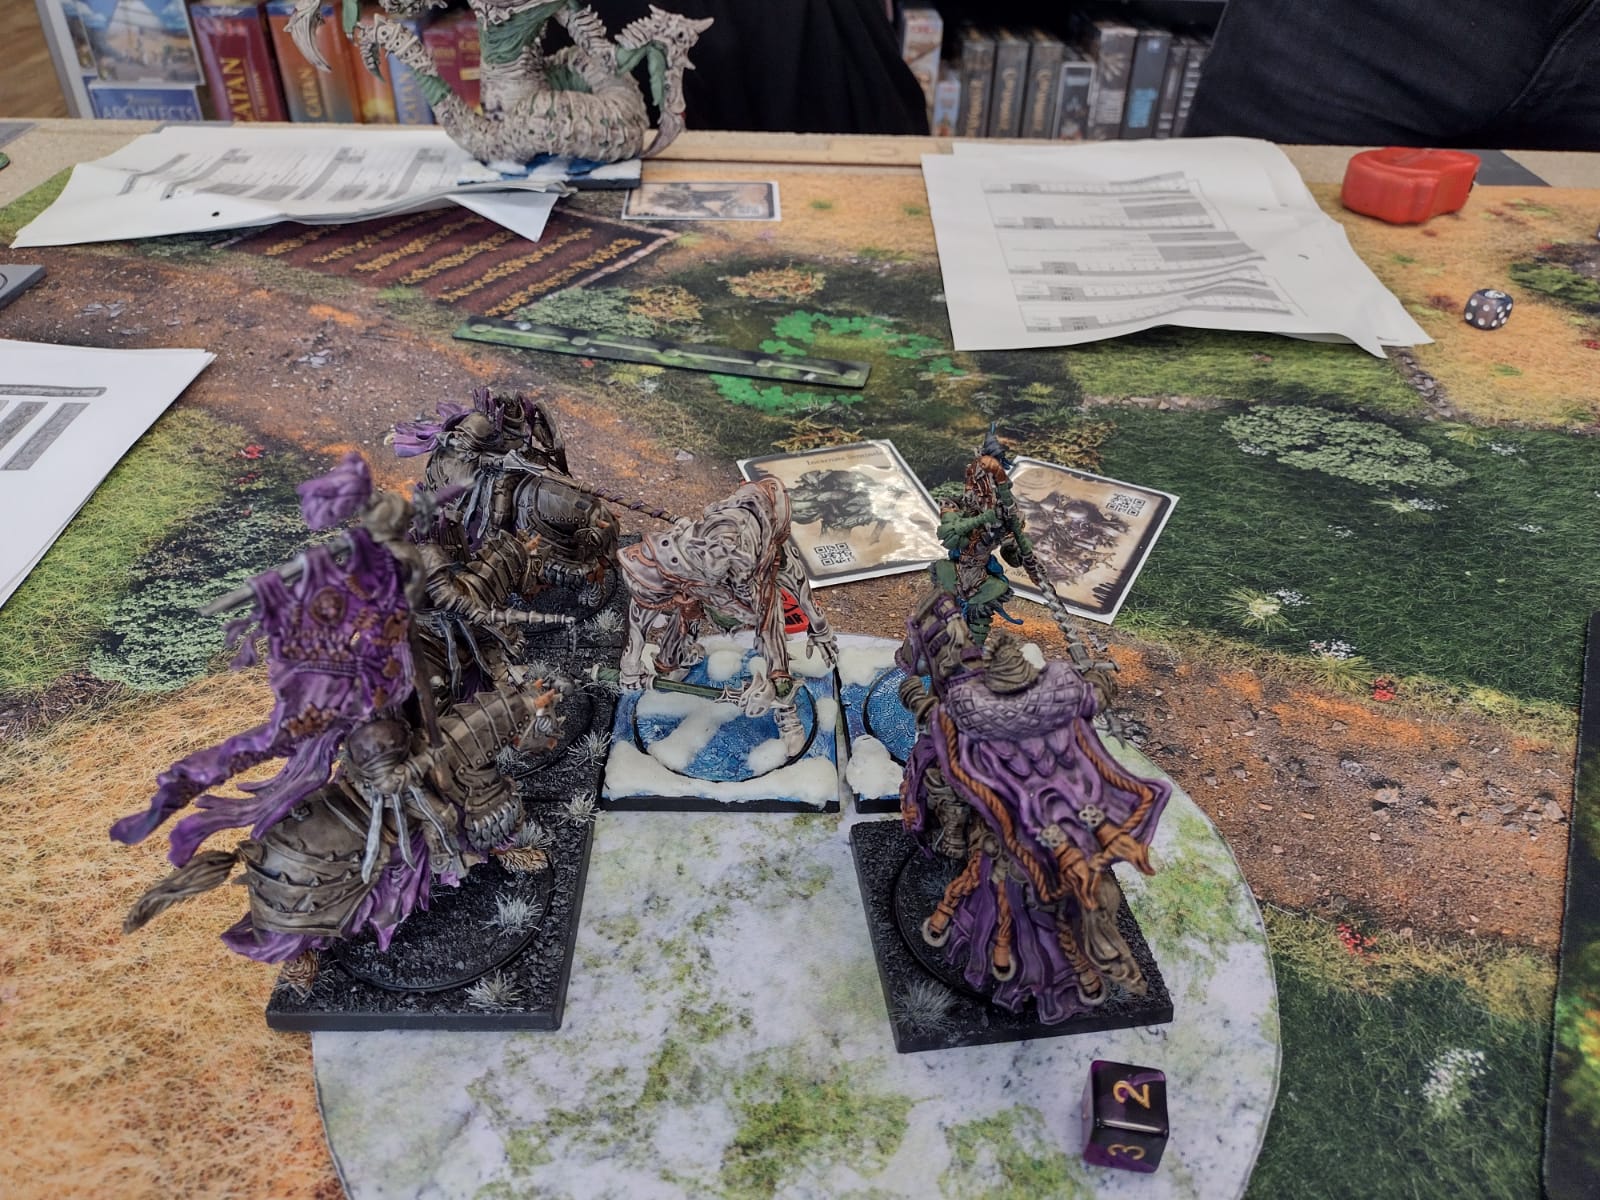
The Ballista survived with one life left. This at least blocks the Dragonslayer, so we go through a series of token activations until the Gilded Legion runs into his small zone on the right side with Doubletime. Since the Dragonslayer had already gone, the Warriors tried their luck and, of course, failed. The second Sorcerer only killed one stand of the Household Guard with spells, and finally, the Initiates went into my right crossbows. Not much came of it, but it opened up a flank attack for my Steel Legion, and they were thus in the zone. Initiates burst, Hanna was pleased. Score: 16:12.

In round five, I was slowly running out of scoring regiments. Far left, I still had a few longbows, steadily retreating from the Drake, in the center the half-dead Household Guard, a few crossbows, and the full Gilded Legion. On the right, a stand of crossbows and full longbows and zweihanders. The question was how quickly the Sorcerer would come over, but I didn't want to measure that. Therefore, the Noble Lord went up top, followed by the Household Guard underneath. The longbows and then the rest mixed in. I started, the ballista were still broken, and when the Sorcerer died in the duel, they shattered. So I could run away. The next card was a Sorcerer who simply had nothing in sight and cursed around. Much later, the regiment was shot by the Fireforged. Six victory points that hurt. Then it was the Gilded Legion's turn. I attacked without inspire and made a reform. There was briefly a consideration to go into the Dragonslayer, but it was better to put the Officer on the other side to take the Cleave away from the Drake, who would probably charge. But he failed with a solid 1, and for me, crossbows ran into position to possibly force later charging Dragonslayers nicely into the armor of the Imperial Officer with three stands. Then came the Dragonslayers. They didn't look bad with only one cleave, but still, two stands of the Gilded Legion died. Then my Steel Legion turned and marched toward the Ironclad. Score: 23:21.

Round six is often the end of many games, but here it was just getting started. Or rather, I got to start, and my Steel Legion hit the flank of the Ironclad. Only a handful of hits, but with my right longbows advancing, the monster fell. A glimmer of hope stirred within me. Then the Fireforged positioned the Sorcerer Warlord. And even though I caught two stands of Dragonslayer before they activated, three stands of Gilded Legion fell to the Sorcerer and the Dragonslayers. Far left, my longbows lost the duel with the toad, which still had three lives, and I considered how I could make the Gilded Legion run away next round. Score: 32:26.

Round seven, the Sorcerer started. The Gilded Legion died. Then the Fireforged came, and even one stand of crossbows went home. So much for hope. The Dragonslayers gathered and briefly enjoyed the zone until the right longbows darkened the sky above the forest. After that, we had a dead Raegh and Dragonslayers, but I only had one scoring regiment left and an angry Sorcerer Warlord rolling towards me. Score: 39:37.

Round eight, and despite a slight lead, things didn't look good. The Sorcerer had too many tokens for anything to make a difference, but he didn't enter any zone. At least not this round. So he headed towards the small zone on the right flank, and as the last activation, I decided to move the Steel Legion forward with Doubletime and attempt to charge him next round. Score: 41:40.

Round nine, I got to start. So I charged, but the tokens said no. Then the Sorcerer simply wished away the Steel Legion. After that, he happily scored two zones for two rounds. Score: 39:53.

Closing Thoughts:
The Dweghom played a list with a moderate amount of shooting, but even that was too much. Coupled with the "Melee" scenario featuring only four scoring regiments and two Warlords, it was as challenging as expected. What really bothered me, though, was my poor positioning in the first two rounds. In hindsight, the new Watermage might have been a great addition, as he is now remarkably effective at healing infantry (3 + 1 per success). However, the Warband is rather uninteresting, and I don't like having a 200-point block as support behind my heavy units. Regardless, those are thoughts for another day. Perhaps in the coming days, I'll share a report from the game against Spire with the same list. They were excited to finally see Hundred Kingdoms as an infantry army without ponies.

Donnerstag, 25. April 2024

Testspiel Hundred Kingdoms Infanterieblöcke gegen Dweghom

Vor ein paar Wochen waren wir beim Spieletag in Hildesheim, und wie üblich hatte ich meine tapferen Menschen mit Stöcken eingepackt.

Hundred Kingdoms [2000/2000] Relentless Drill

== (Warlord) Imperial Officer [130]: Armor of Dominion, Brace for Impact, On Your Feet
• Mercenary Crossbowmen (3) [105]:
• Men at Arms (3) [105]:
• Steel Legion (4) [245]: Standard Bearer, Drillmaster
• Gilded Legion (9) [445]: Standard Bearer, Drillmaster

== (Warlord) Noble Lord [110]: Front Line Tactician
• Household Guard (9) [405]: Standard Bearer, Armsmaster
• Mercenary Crossbowmen (3) [105]:
• Longbowmen (4) [175]:

Während Mass und Benjamin sich momentan im Discord auf große Infanterieblöcke konzentrierten und spielten, entschied ich mich eine ähnliche Liste erneut zu testen. Da ich nur 9 Stände Gilded Legion besitze und nicht plane, weitere anzuschaffen, habe ich eine meiner alte Liste leicht umgestellt. Eine ähnliche habe ich Mitte 2023 häufiger gespielt, aber der Spaß an großen Blöcken verblasste schnell, besonders wenn man es mit massivem Beschuss oder Magie zu tun bekam. Mit Movement 5 ohne weitere Tricks gerät man schnell ins Hintertreffen, insbesondere wenn man keine weiteren Schutzmaßnahmen zur Verfügung hat. D3 R3 schmilzt einfach zu leicht. Daher habe ich Regimenter in der Armee gepackt, die auf Entfernung Schaden zufügen konnten. Ritter wären sinnvoller, aber ich verzichtete hier bewusst darauf und setzte stattdessen auf soliden Beschuss, um meinen Gegner dazu zu zwingen, in meine Blöcke zu rennen. Das Thema war schließlich eine reine Infanteriearmee zu stellen und Je nach meiner Positionierung konnten die Langbögen dann auch mit Arcing Fire weiterhin feuern. Außerdem mag ich einfach Langbögen, und wenn ich schon nur 10 Karten hatte, sind das auch weniger tote Aktivierungen. 

Dweghom [1995/2000]

== (Warlord) Tempered Sorcerer [155]: Fire School, Focused
• Fireforged (3) [180]: <--Warlord
• Inferno Automata (3) [180]:

== Tempered Sorcerer [130]: Fire School
• Hold Ballistae (5) [230]: Standard Bearer <--Sorcerer
• Hellbringer Drake (1) [200]:

== Hold Raegh [140]: Draegbhrud
• Initiates (4) [190]:
• Dragonslayers (3) [240]: Standard Bearer Sorcerer
• Ironclad Drake (1) [220]:
• Hold Warriors (3) [130]:

Dies entsprach nicht dem, was derzeit bei uns oder in Lübeck üblich war, aber hier sollten ein paar Dinge getestet werden. Damit man keine positiven Gedanken mit Dweghom assoziierte, gab es den doppelten Fire Sorcerer noch dazu. Eigentlich sollte der Raegh in die Initiates, aber nachdem wir das Szenario "Melee" ausgewürfelt hatten, wollte der Raegh gerne in die Dragonslayer. Melee war für meine Liste gegen Dweghom nicht so schön, weil ich dort zweimal die Punkte für den Warlord abgeben musste und nur vier punktende Einheiten hatte. Daher musste das Movement stimmen. Immerhin muss meine Liste für keine Heavys oder Mediums würfeln und ich hoffte darauf, dass seine Regimenter nicht optimal auf die Platte kamen.


In Runde eins bekamen wir beide alle Lights und marschierten auf. Zuerst liefen ein paar Crossbows im Wald, und später entschied ich mich dazu, je Seite eine Einheit Longbows zu platzieren. Da ich in der nächsten Runde mit den Man at Arms punkten wollte durfte ein Regiment Longbows 18“ laufen.


In Runde zwei bekamen wir beide alle Mediums. Das empfand ich ein wenig unfair und vor allem problematisch. 7:8 Karten, und ich wollte gerne meine Armee auf der Seite haben, wo keine Magier waren, aber wenn ich mich jetzt rechts platzierte, standen da gleich auch Drache und Co., oder umgekehrt. Daher entschied ich mich, die beiden Nahkampfregimenter und den Noble Lord nach oben zu legen, und anschließend meine Schützen. Ich hätte problemlos in der linken großen und kleinen Zone punkten können, ohne Deckung, aber 9 Stände profitierten sowieso so gut wie nie von Deckung. Vielleicht konnte ich so genügend Vorsprung aufbauen. Außerdem waren meine Regimenter auf der rechten Seite mir deutlich im Weg. So machte ich das dann auch und blieb so gerade außerhalb der Schussreichweite. Dann marschierten der Drake und der Sorcerer Warlord entsprechend weit links auf, und nur ein paar Warrior und Initiates auf der anderen Flanke. Es gab zwar auch noch Automata, aber die traute sich eindeutig zu nah dran und machten eine Unschöne Bekanntschaft mit den Langbögen und Armbrüsten. 7:0


In Runde drei bekamen wir beide wieder alle Regimenter. Wofür bezahlte ich Flank, wenn mein Gegner das so bekam? So musste Uziel sich immer mit den Nords fühlen. Egal. Neben den offensichtlichen Dingen wie Langbögen, die Automata erschossen, gab es kaum brauchbare Dinge zu tun. Das Retten der anderen Langbögen und der Man at Arms wäre noch etwas gewesen, aber ansonsten fiel mir nichts ein. Der große Household Guard Block wollte so spät wie möglich nach vorne, um möglichst wenig Schaden durch den Beschuss und keinen durch die Feuermagie zu erhalten. Was ich nicht ganz erwartet hatte, war, dass die Fireforged als erstes 10“ nach vorne marschierten, damit der Warlord meine Man at Arms wegbrennen konnte und die Kröte in die Zone watscheln konnte. Gar nicht so schlecht, sollte sie da halt den Rest des Spiels drei Punkte farmen. Vielleicht konnten die linken Longbows die auch erschießen. Bevor ich soweit war erschosen die Longbows aber zwei Stands Ballista und die anderen die Automata. Wobei beide Regimenter schon angeschlagen durch die Langbögen in der Runde davor waren. Dann gab es mittig die Gilded Legion und rechts die Steel Legion. Ihr gegenüber kam der Ironclad, der aufgrund der fehlenden Kanonen gar nicht wie eine Kröte aussah. Vielleicht konnte ihn die Gilded Legion laufen lassen, aber ich machte mir da keine großen Hoffnungen. Ansonsten marschierten die Initiates noch freudig nach vorne, um die rechte Flanke zu sichern. Dann kamen endlich, gerade noch vor meiner Karte, die Ballista. Der Beschuss, der auf die Guard niederprasselte, war eigentlich gar nicht so schlimm, aber trotzdem sechs Wunden. Daher und weil da ein Sorcerer Warlord stand, überlegte ich kurz, die Guard zurückzuziehen, aber in dem Augenblick kam Nino an die Platte und zitierte Honecker, weshalb ich mich tapfer in den Fleischwolf stürzte: Vorwärts immer, rückwärts nimmer! 11:9


In Runde vier wollte ich gerne anfangen, und mit einer Guard noch etwas machen, daher lag die oben. Darüber der Noble Lord, falls ich nicht anfange, und natürlich fange ich nicht an. Sorcerer Warlord, zwei Feuerzauber und dann die Fireforged als Folgeaktivierung. Da starben einfach 6 Stands. Zum Knochenkotzen, aber ich aktiviere den Lord, der sammelt seine zwei Stands und dann kommt der Charge in die Ballista.


Die überlebten mit einen Leben. Dadurch stehen sie immerhin den Dragonslayer im Weg, und wir machen also eine Reihe an Alibi-Aktivierungen, bis die Gilded Legion mit Doubletime in seine kleine Zone auf der rechten Seite rennt. Da die Dragonslayer schon dran waren, versuchten die Warrior ihr Glück und scheiterten natürlich. Der zweite Sorcerer tötete nur einen Stand der Household Guard mit Zaubern, und als letztes gingen dann die Initiates in meine rechten Crossbows. Dabei kam nicht viel heraus, aber es eröffnete meiner Steel Legion einen Flankenangriff, und sie waren dadurch in der Zone. Initiates platzten, Hanna freute sich. 16:12

In Runde fünf gingen mir die punktenden Regimenter langsam aus. Ganz links hatte ich noch ein paar Langbögen, die immer weiter vor dem Drake zurückwichen, mittig die halbtote Household Guard, ein paar Crossbows und die volle Gilded Legion. Rechts ein Stand Crossbows und volle Langbögen und Zweihänder. Die Frage war, wie schnell der Sorcerer rüberkam, aber ich wollte das nicht messen. Daher der Noble Lord nach oben und darunter die Household Guard. Die Langbögen und dann gemischt der Rest. Ich fing an, die Ballista waren noch Broken, und als der Sorcerer im Duell starb, shattered sind. So konnte ich weglaufen. Die nächste Karte war ein Sorcerer, der einfach nichts im Sichtbereich hatte und rumfluchte. Viel später wurde das Regiment dann aber doch durch die Fireforged erschossen. Sechs Siegpunkte, die wehtaten. Dann war die Gilded Legion dran. Ich schlug ohne Inspire zu und machte einen Reform. Kurz war die Überlegung, in die Dragonslayer zu gehen, aber es war besser, den Officer auf die andere Seite zu packen, um dem Drake, der vermutlich chargen würde, das Cleave zu nehmen. Der versagte aber mit einer soliden 1, und bei mir rannten Crossbows in Position, um eventuell später anstürmende Dragonslayer schön mit drei Stands in die Rüstung des Imperial Officers zu zwingen. Dann kamen auch die Dragonslayer. Die schauten nicht schlecht aus, als nur einer Cleave hatte, aber trotzdem starben zwei Stand der Gilded Legion. Dann drehte sich noch meine Steel Legion und marschierte in Richtung des Ironclad. 23:21

Runde sechs ist oft das Ende von vielen Spielen, hier fing es aber erst richtig an. Bzw ich durfte anfangen und meine Steel Legion ging in die Flanke des Ironclad. Nur eine Handvoll Treffer, aber da meine rechten Langbögen vorgearbeitet hatten, fiel das Monstrum. In mir keimte leichte Hoffnung. Dann brachten die Fireforged den Sorcerer Warlord in Position. Und auch wenn ich zwei Stands Dragonslayer erwischte, bevor sie aktivierten, gingen drei Stands Gilded Legion durch den Sorcerer und die Dragonslayer. Ganz links verloren meine Langbögen das Duell mit der Kröte, die noch drei Leben hatte, und ich überlegte, wie ich nächste Runde die Gilded Legion dort wegrennen lassen könnte. 32:26

Runde sieben, der Sorcerer begann. Die Gilded Legion starb. Dann kamen die Fireforged, und auch der eine Stand Crossbows ging nach Hause. So viel zum Thema Hoffnung. Die Dragonslayer sammelten sich und freuten sich kurz über die Zone, bis über dem Wald die rechten Langbögen den Himmel verdunkelten. Anschließend hatten wir einen toten Reagh und Dragonslayer, ich aber nur noch ein punktendes Regiment und einen wütenden Sorcerer Warlord, der auf mich zuwalzte. 39:37

Runde acht und trotz leichter Führung sah es nicht gut aus. Der Sorcerer hatte zu viele Token, als dass das etwas bewirken würde, aber er kam in keine Zone. Jedenfalls nicht in dieser Runde. Daher ging er auf die kleine Zone auf der rechten Flanke zu, und ich entschied mich als letzte Aktivierung, die Steel Legion mit Doubletime nach vorne zu ziehen und nächste Runde den Versuch zu unternehmen ihn zu chargen. 41:40

Runde neun durfte ich anfangen. Also Charge und die Token sagten nein. Anschließend wünschte sich der Sorcerer die Steel Legion einfach weg. Dann punktete er freudig zwei Runden lang zwei Zonen. 39:53


Schlusssworte:
Die Dweghom haben eine Liste mit mittelmäßig viel Beschuss gespielt, aber selbst das ist schon zu viel gewesen. Dazu das Szenario Melee mit nur vier punktenden Regimentern und zwei Warlords. Wie erwartet war das anstrengend. Was mich aber wirklich störte, war meine schlechte Positionierung in den ersten zwei Runden. Im Nachhinein wäre der neue Watermage vielleiicht eine tolle Ergänzung gewesen, da er mittlerweile wieder bemerkenswert gut Infanterie heilt mit 3 + 1 pro Erfolg. Nur ist die Warband ziemlich uninteressant und ich mag keinen 200 Punkte Block als support hinter meinen dicken Blöcken laufen lassen. Egal, das sind Gedanken für einen anderen Tag.  Vielleicht kommt die Tage noch der Spielbericht vom Spiel gegen Spire mit der gleichen Liste. Der freute sich endlich Mal Hundred Kingdoms als Infanterie Armee und ohne Ponys zu sehen.

Sonntag, 21. April 2024

Hamburg, April 2024: Game 3 - Hundred Kingdoms against Dweghom at Forlon Hope

Overview:
Game 1
Game 2
Game 3


Finally, the finale from Hamburg against Dweghom. But first, as a reminder, here's my army list:

All you need is love [1500/2000]
Relentless Drill

== (Warlord) Imperial Officer [90]: Brace for Impact, On Your Feet
 * Men at Arms (3) [105]:
 * Mercenary Crossbowmen (3) [105]:
 * Mercenary Crossbowmen (3) [105]:
 * Mercenary Crossbowmen (3) [105]:

== (Warlord) Priory Commander (Crimson Tower) [110]:
 * Order of the Crimson Tower (3) [200]:
 * Order of the Crimson Tower (3) [200]:
 * Order of the Ashen Dawn (3) [240]:
 * Order of the Ashen Dawn (3) [240]:


My final enemy once again was Jens Karacho with double Sorcerer on a toad.

Dweghom [1500/2000]

== (Warlord) Tempered Sorcerer [135]: Magma School, Hellbringer Sorcerer
* Fireforged (3) [180]:
* Hellbringer Drake (1) [200]:

== Tempered Sorcerer [135]: Magma School, Hellbringer Sorcerer
* Fireforged (3) [180]:
* Hellbringer Drake (1) [200]:

== Hold Raegh [110]: Fuelled by the Furnace
* Hold Ballistae (3) [140]:
* Dragonslayers (3) [220]:

The list is for really good friends. Or as Nick would put it: "I deserve opponents like these." I see it a bit differently, and the firepower of the list is quite impressive. Fortunately, we're playing Forlorn Hope, and a high field divides the battlefield, so he'll have to split up.

Round 1: We both deploy our light regiments onto the battlefield and coincidentally in positions to shoot the markers.


Round 2: Jens gets a Drake and both Fireforged. I settle for my Men at Arms and bring them into the right flank rather late. Prior to this, facing me are one unit of Fireforged and on the other flank the others along with a Drake. This is the Drake without a Warlord. As one unit of Crossbows is eager, my objective quickly falls, leading us into round three. Score: 5:0

In round three, he receives the rest and I get two units of Riders. I opt for Ashen Dawn and Crimson Tower with a Commander and place the characters on top, then the riders, Crossbows, and at the very bottom, the Men at Arms. The main reason I had placed the Men at Arms on the right side was that there was no Drake there yet. If perhaps I place both riders on the left flank, then there might be the option for him to place the second toad and the Dragonslayer there as well. Then the Men at Arms could safely run into the rear right zone and deny it to him. That was the plan. It held up for two activations, and then the second toad, the Warlord, marched onto this flank. Nevertheless, I placed the Ashen Dawn on the left, and facing them came the Dragonslayer, allowing for a slightly modified version of my plan. My Crimson Tower also went to the right flank, and my Men at Arms positioned themselves so that the Fireforged, who had previously gone into the zone, could shoot at me directly if they moved a bit, just enough so that the Crimson Tower didn't have to roll unnecessarily. The hope was that he would overlook that and not lay a puddle there next round, making it difficult for me to maneuver. Score: 7:4

In round 4, we had 10:8 cards. Deckbuilding was straightforward since I was far enough away from him. I decided to start by placing the Crossbows at the top to annoy the right Drake and the Fireforged, and the Crimson Tower far down. If needed, I could even delay my advance for another round. Then Jens got to start, destroyed the marker, and I shot a bit at the Fireforged and then at the dragon. Three damage each was okay, and it was enough to make the Warlord feel provoked enough to summon a lava pool towards the Crossbows and deal some damage there. The second sorcerer followed suit, and one regiment of Crossbows went down. At least the Fireforged on the right flank also moved forward, and then came the Crimson Tower charge. I left one stand with two lives, but overall, I was satisfied. Now I controlled three zones, and the next Crimson Tower went to the same position as the first ones. However, the second Ashen Dawn was a bit excessive since the first ones only just moved into the zone, and I had no interest in running into the firing range of the left flank. Score: 16:6


In round five, I started with my Supremacy and got to go first. Naturally, the Crimson Tower were at the top and managed 9 hits without Inspire. Okay, the Commander got five and the others four, but altogether it was nine, and Jens considered taking five tokens to maybe survive the onslaught. However, he only had a total of five, and the regiment only had four lives left. He decided against it, and the Fireforged perished. Then I went for the dragon, and 16 impacts with Blessed and Terrifying were too much even with 5 tokens, so the Warlord went down, and I finally owned the entire right flank.

I brought up the second Crimson Tower, positioned the Men at Arms so that they could score both zones next round, and then charged the second Fireforged with the second Ashen Dawn using Move Charge. This left him with the choice of sacrificing the next round to kill the Ashen Dawn with the Dragonslayers or shooting at the guys for a few rounds. Either way, I would score at least nine more points over the next two rounds. Score: 27:8

Rounds six to ten, I positioned myself, and he tried steadfastly and successfully to defend his zone. However, since I withdrew the Crossbows, from round seven onwards, I had almost twice as many cards as he did, and most of them I could use to bide my time. So, I consistently scored in three zones, while Jens scored in one for the rest of the game, which... Here are a few more pictures, but essentially, it was all over in round 5 with the death of the Warlord. Even if he managed to break through on the left, I could have held him off long enough to secure the victory on points. Plus, I could now attack him from two sides, and I had four almost unscathed blocks of knights, which with five or six lives would last that bit longer, just as I always needed.

The tournament was over, I had secured three victories, and since the scoring was based on scenario points rather than SoS, I could rejoice in the first place, as well as in a true rain of prizes at the raffle, which I accepted together with Uziel.


My pre-tournament considerations proved to be accurate, however, I remain dissatisfied with the 1500 points for exactly that reason. Wuetty had set this point value solely because he was eager to host another tournament with painting requirements, and many players couldn't present enough painted units. From this perspective, it was an acceptable compromise. Furthermore, despite the delayed start - the store employee roughly opened up a quarter of an hour after official closing time, which delayed the welcoming, scenario setup, etc. - Wuetty managed to stick to the schedule.

Hamburg, April 2024: Spiel 3 - Hundred Kingdoms gegen Dweghom auf Forlon Hope

Übersicht:
Spiel 1
Spiel 2
Spiel 3


Zu guter Letzt das Finale aus Hamburg gegen Dweghom. Aber vorher nochmal zur Erinnerung meine Armeeliste:

All you need is love [1500/2000]
Relentless Drill

== (Warlord) Imperial Officer [90]: Brace for Impact, On Your Feet
 * Men at Arms (3) [105]:
 * Mercenary Crossbowmen (3) [105]:
 * Mercenary Crossbowmen (3) [105]:
 * Mercenary Crossbowmen (3) [105]:

== (Warlord) Priory Commander (Crimson Tower) [110]:
 * Order of the Crimson Tower (3) [200]:
 * Order of the Crimson Tower (3) [200]:
 * Order of the Ashen Dawn (3) [240]:
 * Order of the Ashen Dawn (3) [240]:


Mein Mitspieler war wieder Mal Jens Karacho mit Doppel-Sorcerer auf Kröte:

Dweghom [1500/2000]

== (Warlord) Tempered Sorcerer [135]: Magma School, Hellbringer Sorcerer
* Fireforged (3) [180]:
* Hellbringer Drake (1) [200]:

== Tempered Sorcerer [135]: Magma School, Hellbringer Sorcerer
* Fireforged (3) [180]:
* Hellbringer Drake (1) [200]:

== Hold Raegh [110]: Fuelled by the Furnace
* Hold Ballistae (3) [140]:
* Dragonslayers (3) [220]:

Die Liste ist für wirklich gute Freunde. Oder wie Nick sich ausdrücken würde: "Solche Gegner habe ich verdient." Ich sehe das natürlich etwas anders, und der Beschuss der Liste ist schon recht imposant. Positiverweise spielen wir jedoch Forlon Hope, und ein hohes Feld teilt das Spielfeld, daher wird er sich aufteilen müssen.

Runde 1: Wir bringen beide unsere leichten Regimenter auf das Spielfeld und zufällig in Position, um die Marker zu erschießen.

Runde 2: Jens bekommt einen Drake und beide Fireforged. Ich begnüge mich mit meinen Man at Arms und bringe die recht spät in die rechte Flanke. Vorher erscheinen dem gegenüber eine Einheit Fireforged und auf der anderen Flanke die anderen samt Drake. Das ist der Drake ohne Warlord. Da eine Einheit Crossbows Lust hat, fällt auch schnell mein Objektiv, sodass wir in Runde drei gehen. 5:0

In Runde drei gibt es für ihn den Rest und für mich zwei Einheiten Reiter. Ich entscheide mich für Ashen Dawn und Crimson Tower mit Commander und lege die Charaktere nach oben, dann die Reiter, Crossbows und ganz nach unten die Man at Arms. Der Hauptgrund, warum ich die Man at Arms auf die rechte Seite gestellt hatte, war, dass dort noch kein Drake war. Wenn ich vielleicht beide Reiter auf die linke Flanke stelle, dann könnte die Option bestehen, dass er die zweite Kröte und die Dragonslayer auch dort hinstellt. Dann könnten die Man at Arms sicher in die hintere rechte Zone laufen und ihn die verweigern. So der Plan. Der hielt zwei Aktivierungen, und dann marschierte die zweite Kröte, der Warlord, auf dieser Flanke auf. Trotzdem stellte ich die Ashen Dawn links, und dem gegenüber kamen brav die Dragonslayer, was eine etwas abgewandelte Form meines Plans erlaubte. Meine Crimson Tower gingen auch auf die rechte Flanke, und meine Man at Arms stellten sich so, dass die Fireforged, die vorher in die Zone gegangen waren, genau auf mich schießen konnten, wenn die sich etwas bewegten, so weit, dass die Crimson Tower nicht erst unnötig würfeln mussten. Die Hoffnung war, dass er das übersieht und dort nächste Runde keine Fütze hinlegt, die mir die Impacts schwer macht. 7:4


In Runde 4 hatten wir 10:8 Karten. Der Deckbau war unkompliziert, da ich weit genug von ihm weg war. Ich entschied mich erst mal, die Crossbows nach oben zu legen, um den rechten Drake und die Fireforged zu ärgern, und die Crimson Tower weit nach unten. Im Zweifel könnte ich meinen Vorstoß auch noch eine Runde verzögern. Dann durfte Jens anfangen, zerstörte den Marker, und ich schoss ein wenig auf die Fireforged rum und dann auf den Drachen. Jeweils drei Schaden waren okay, und das reichte, damit der Warlord sich provoziert genug fühlte, um einen Lavateich in Richtung der Crossbows zu beschwören und dort etwas Schaden zu verteilen. Der zweite Magier machte es ihm nach, und ein Regiment Crossbows ging nach Hause. Immerhin bewegten sich die Fireforged auf der rechten Flanke auch nach vorne, und dann gab es den Crimson Tower Charge. Ich ließ einen Stand mit zwei Leben stehen, aber war insgesamt zufrieden. Jetzt kontrollierte ich drei Zonen, und die nächsten Crimson Tower gingen an die gleiche Position wie die ersten. Die zweiten Ashen Dawn hingegen waren ein wenig über, da die ersten sich nur gerade so in die Zone bewegten, und ich keinerlei Interesse verspürte, in Beschussreichweite der linken Flanke zu rennen. 16:6


In Runde fünf startete ich mit meiner Supremacy und durfte anfangen. Natürlich lagen die Crimson Tower oben und schafften ohne Inspire 9 Hits. Okay, der Commander schaffte fünf und die anderen vier, aber insgesamt waren es neun, und Jens überlegte, fünf Token zu nehmen, um das Ganze vielleicht zu überleben. Allerdings hatte er insgesamt nur fünf, und das Regiment nur noch vier Leben. Er entschied sich, das nicht zu tun, und die Fireforged starben. Dann ging ich in den Drachen, und 16 Impacts mit Blessed und Terrifying waren mit 5 Token dann auch zu viel, und somit ging der Warlord nach Hause, und mir gehörte final die gesamte rechte Flanke.

Ich zog die zweiten Crimson Tower nach, positionierte die Man at Arms so, dass sie nächste Runde beide Zonen punkten konnten, und ging mit den zweiten Ashen Dawn dann mit Move Charge in die zweiten Fireforged. So hatte er die Wahl, die nächste Runde zu opfern, um mit den Dragonslayern die Ashen Dawn zu töten, oder ein paar Runden auf die Jungs zu schießen. So oder so würde ich mindestens zwei weitere Runden neun Punkte machen. 27:8

Runde sechs bis zehn positionierte ich mich, und er versuchte eisern und erfolgreich, seine Zone zu verteidigen. Aber da ich die Crossbows zurückzog, hatte ich ab Runde sieben fast doppelt so viele Karten wie er, und die meisten davon konnte ich nutzen, um abzuwarten. Ich punktete also bis zum Rest des Spiels immer drei Zonen, und Jens eine, wodurch... Hier noch ein paar Bilder, aber im Grunde war das in Runde 5 mit dem Tod des Warlords durch. Selbst wenn er links noch durchbrechen würde, hätte ich ihn lange genug aufhalten können, um das nach Punkten nach Hause zu fahren. Außerdem konnte ich ihn jetzt von zwei Seiten angreifen und hatte vier fast unverletzte Ritterblöcke, die mit fünf oder sechs Leben diesen Tick länger Leben, den ich immer gebraucht habe.

Das Turnier war vorüber, ich hatte drei Siege errungen, und da die Punktwertung auf Szenariopunkten basierte statt auf SoS, konnte ich mich über den ersten Platz freuen, ebenso wie über einen wahren Regen an Preisen bei der Tombola, den ich gemeinsam mit Uziel entgegennahm.


Nachbetrachtung:

Meine vor dem Turnier angestellten Überlegungen erwiesen sich als zutreffend, jedoch bleibe ich genau aus dem Grund unzufrieden mit 1500 Punkten. Wuetty hatte diese Punktzahl lediglich festgelegt, da
 im Zwergenfürst stets Bemalpflicht gilt und er möglichst vielen Spielern das mitmachen ermöglichen mochte. Aus dieser Perspektive betrachtet, war dies ein akzeptabler Kompromiss. Zudem gelang es Wuetty trotz des verzögerten Starts – der Ladenmitarbeiter schloss grob eine Viertelstunde nach offiziellem Ladenschluss auf, was die Begrüßung, das Aufstellen des Szenarios usw. verzögerte –, den Zeitplan einzuhalten.

Mittwoch, 17. April 2024

Hamburg, April 2024: Game 2 - Hundred Kingdoms against Spire at Bulwark

Overview:
Game 1
Game 2
Game 3


The second report from the tournament in Hamburg, and now it's against the dreaded Spire. But before we dive into my escapades of insults about the absolutely cheeky faction, here's my nice army list again:

All you need is love [1500/2000]
Relentless Drill

== (Warlord) Imperial Officer [90]: Brace for Impact, On Your Feet
 * Men at Arms (3) [105]:
 * Mercenary Crossbowmen (3) [105]:
 * Mercenary Crossbowmen (3) [105]:
 * Mercenary Crossbowmen (3) [105]:

== (Warlord) Priory Commander (Crimson Tower) [110]:
 * Order of the Crimson Tower (3) [200]:
 * Order of the Crimson Tower (3) [200]:
 * Order of the Ashen Dawn (3) [240]:
 * Order of the Ashen Dawn (3) [240]:

The army list of the Spire was led onto the battlefield by none other than Benjamin (known as Waaghi on Discord)!

His joy at playing against me was almost as great as a visit to the dentist. After all, Waaghi was already accustomed to my very slight dislike of the Spire through Discord, so we could laugh a lot during the game. Although my laughter always fades when, for example, I see a D4 R4 monster with Smite that can easily be brought to Movement 8 Clash 4 and 6 rerolls. Add to that a Biomancer who kindly didn't have the option to activate three regiments per round. Only two, which is annoying enough. And if I recall correctly, currently only those damned aliens are able to activate another regiment besides their own with the activation of a character, and then also theirs. I personally find this completely out of line, and that's still a really friendly statement about it.

Test [1500/1500] - The Spires The Sovereign Lineage

== (Warlord) Lineage Highborne [140]: Cascading Degeneration, Command Pheromones, Pheromantic Override, Attracting Pheromones
• Avatara (3) [180]: Superior Creations
• Incarnate Sentinels (4) [280]:
• Siegebreaker Behemoth (1) [190]: aka der Shrimp

== Biomancer [155]: Degenerative Aura, Fleshcarver
• Bound Clones (5) [225]: Ward Preceptor
• Abomination (1) [150]:

Well, overall, it's the standard Spire filth. The 5-block also makes sense on the scenarios because he surely wants to park it in a zone and with the Biomancer on D5, he gets it. I don't know where he wants to steal the armor from, but we all have to make compromises at 1500 points.

The scenario played was Bulwark, and the organizer explained to us that we would take a half-hour lunch break after the game. Waaghi and I were hungry, and if we could finish the game in just half the scheduled two hours, we could comfortably walk to the baked potato / kebab stand. That sounded like a plan I would have agreed to if it hadn't come from a Spire. It sounded very much like a trap to devour my helpless, brave humans with sticks or something.


In round 1, I played alone, and my three crossbows headed towards the central marker. The plan for this game was simple: I would secure the middle objective, block his right zone first, and then overrun it. In the left zone, I would place Ashen Dawn, which should keep the objective alive as long as possible before bravely dying. Mathematically, I would win with three or five points without much fighting.


In round 2, I had to put my Man at Arms into the deck, and Benjamin once Avatara du Bound Clones. Deck building was easy because there were few options. Therefore, the objective was destroyed first, the Avatara marched towards the crossbows, and the Bound Clones opposite the crossbows. In response, I positioned my Man at Arms. Nice and wide, so they could block the zone with Double Time in the next round. 3:0

Round 3, and of course, the Spire were allowed to put all their cards into the deck. Miserable aliens with their living dice. I distinctly saw how, at the command of the Biomancer, little hands grew out of the dice and placed them on the right side. Definitely. Well, when humanity faces monsters and nightmares, there are two options: 1. Brave humans with sticks who stand up to them and often die in the attempt. 2. Those whom even darkness itself fears come to the rescue. I mean none other than the greatest heroes of humanity, the last bastion against monsters and nightmares, and the final guardians of the Sealed Temple. So, there were two Ashen Dawn and one Crimson Tower in my deck. Fair, we both had three Heavys, even if the battle shrimp is still way too cheap. A D4 monster for 190 points... well, somehow I digress.

The Spire got to start, taking everything from us, even the initiative, and the Avatara moved with Move Charge into the first crossbows. I was okay with that, and my Man at Arms moved 15" over his objective and blocked the zone. This meant his Bound Clones could find another living room or charge me on five or six. It didn't matter to me as long as he didn't score. Then my characters and crossbows followed, so I could see where Benjamin placed his Heavys. His Avatara, of course, passed almost every protection roll, again due to those hands growing out of the dice. It was getting really cheeky. However, some stuff moved up, and I hoped a little that the shrimp would move to the left flank, but it joined the Bound Clones instead. The Abomination went to the left zone, as Ashen Dawn wanted to appear there, and the Incarnates liked to play there too. That was okay, and I decided to place my two remaining Heavys on the right side. Firstly, to make the objective fall, and secondly, to beat up the Avatara. The last Avatara also appeared on the right. 3:0


Round 4, and the deck building was quite simple. One Ashen Dawn was allowed to be on top, then Man at Arms, crossbows, characters, Crimson and Crimson, and Ashen Dawn downwards. This way, I could react and see what was happening on the field. Maybe the shrimp wouldn't go into the Man at Arms and would go around them. Unlikely, but possible. The brave humans got to start, and the Ashen Dawn failed to slay the Avatara. I looked a bit grumpy at my dice, but shortly after, the crossbows went crazy and got rid of the problem. The true elite of the elite. Almost as good as melee archers. My Man at Arms moved forward and smiled. Instead of the shrimp, who obviously feared the nice knights, the Bound Clones activated, not moving. Only after that, the shrimp got to eat the Man at Arms, and I grabbed the objective and also the zone with the Crimson Tower. The zone was worth 4 points this round. And for the next round, I just had to start before the shrimp or roll well with the Ashen Dawn. Nothing else happened on the flank except for the second Avatara, which again entangled a few helpless crossbows with Move Charge. On the other flank, my second Crimson Tower marched on, and his Incarnates moved towards the zone.


Then came the decision to destroy the objective with the Abomination and allow the Ashen Dawn to attempt a charge or not score. We discussed the possibilities, and I decided to try the charge on a 5 if necessary. I didn't want to go into the zone to deny it unless I also got to eat the Abomination in the process. After all, I already saw that the Highborne could get an extra movement for the Incarnates and then bring them into me with the follow-up activation if I were to come just four inches forward. If that was okay, then he wouldn't be able to reach me easily. After a brief back and forth, our decks were built for the next round, and then the Abomination decided to destroy the objective after all. The Ashen Dawn attempted the charge, succeeded, and slew the monster. Therefore, I scored both zones. 10:3


Round 5, and I activate my Supremacy, as the Liken Ashen Dawn need Hardened. My deck building didn't change. I speculated that he saw the Ashen Dawn as the biggest threat. They were now in auto-charge range of the Incarnates. The other Ashen Dawn and Crimson were within reach of the shrimp. If I don't start and the Ashen Dawn are half-dead, it's no use to me. But if the shrimp goes after the Crimson Tower first, they'll likely explode. At least they always did directly in the past. So, my deck build was Crimson Tower, Ashen Dawn, Crimson Tower, crossbows, characters, and the remaining Ashen Dawn. He started, and the Incarnates killed the first Ashen Dawn. The other two had a total of 7 life left. Annoying. On the other flank, the Crimson Tower got to do the Charge Clash against the shrimp and killed it precisely with Blessed, and for him, the shrimp would have been the next card. Unexpectedly, it wasn't the Highborne, but instead the Avatara who killed the crossbows. I liked that because it allowed me to activate my Ashen Dawn, one died, and the other soloed an Incarnate. Then the Crimson Tower rushed into the flank with Move Charge, taking down another Incarnate, and one was in very bad shape, depending on how the additional clash would turn out. But that was still a long time coming, allowing the crossbows to shoot down another Incarnate. Only then did the additional clash come through Pheromantic Override and cost me the last Ashen Dawn. But I had both zones, and Ashen Dawn with Move Charge could still go into the Bound Clones. 17:3


Round 6, and Benjamin got to start, and the Incarnates, or rather the Incarnate with the Highborne, turned and killed a Crimson Tower. The other Crimson Tower took down the Bound Clones in the Charge Clash, definitively cementing humanity's claim to the right zone. Although there were still Avatara left, they didn't really want to play with Ashen Dawn. On the other side, the Crimson Tower and crossbows managed to kill the Incarnate, ending the game. With that, we were the second pair finished in just over an hour. Uziel and Nino had played against each other and were also done, so the four of us decided to take a trip to the local kebab stand.