Posts mit dem Label Nords werden angezeigt. Alle Posts anzeigen

Donnerstag, 10. April 2025

Spielberichte vom 2 Tages Turnier in Winnenden

Letztes Wochenende stand das zweite deutsche Zweitagesturnier in Winnenden an, und das Line-up hatte es in sich: 22 Spieler, darunter die französische Elite und die süddeutsche Szene in Bestform. Es war klar, das wird kein Spaziergang.

Spontan entschieden Nino und ich, die Fahne des Nordens hochzuhalten und uns trotz der 8-stündigen Anreise ins Getümmel zu stürzen. Uziel konnte leider aus beruflichen Gründen nicht mitkommen, also musste ich das Wochenende ohne meinen Schatzi-mon überstehen.

Ich blieb bei meiner bewährten Liste, mit der ich schon auf der ITC und anderen Turnieren gute Erfolge feiern konnte. Auf dem Feld macht sie ordentlich was her, ich bin gut eingespielt, und mein Ziel war klar: ein sauberes 5:0.

== (Warlord) Chieftain [130]: Conquest, Vision

  • Veterans (3) [170]
  • Veterans (3) [170]
  • Slingers (3) [150]

== Predator [100]: War

  • Braves (3) [130]
  • Hunting Pack (3) [120]
  • Apex Predator (1) [190]
  • Slingers (3) [150]

== Predator [100]: War

  • Braves (3) [130]
  • Hunting Pack (3) [120]
  • Apex Predator (1) [190]
  • Slingers (3) [150]

Keine Änderungen, dafür weiterhin grüne Gewalt, jedenfalls bei meiner Bemalung. Die Liste bringt in Runde 1 mindestens fünf Karten, in Runde 2 mindestens sieben. Dazu genügend Tokens, um drei Slinger dauerhaft zu versorgen und bei Bedarf auch mal ein paar Braves oder Veterans chanten zu lassen.

Was die Liste wirklich unangenehm macht, sind die Hunting Packs. Zusammen mit den Slingern bauen sie enormen Druck auf und funktionieren gleichzeitig als perfekter Screen und Schutz für die Schützen. Dass ich in manchen Szenarien in Runde 2 nicht punkten kann, nehme ich in Kauf. Theoretisch ließe sich das umgehen, wenn ich die beiden Apexe gegen einen Winglord und einen Quatl tauschen würde. Ist auch in Planung, aber unbemalte Modelle zu spielen ist keine Option.


Spiel 1 gegen Konrad „DrizztDarnok“ Zacharias (Nords, NTR 9 Deutschland)

Das Turnier in Winnenden startete direkt mit einem harten Gegner. In meinem ersten Spiel traf ich auf Konrad, der aktuell auf Rang 9 der deutschen NTR-Liste steht. Er ist nicht nur einer der besten und erfahrensten Nord-Turnierspieler, sondern auch bekannt als Mitgründer des Podcasts Feldherren von EA und Sieger des vorletzten Bedburg-Turniers.

Ich freute mich ehrlich auf das Match. Obwohl wir uns von Events gut kennen, stehen wir nur selten gemeinsam am Tisch. Unser letztes direktes Aufeinandertreffen war Anfang letzten Jahres in Frankfurt, und ich hatte Lust auf ein neues Duell.

Konrads Liste liegt mir leider nicht vor, daher grob aus dem Kopf:

Nords [2000/2000]

== Jarl [120]: Reyngeir, the God Spear
 * Raiders (3) [140]: Captain
 * Raiders (3) [140]: Captain
 * Bearsarks (3) [200]: Savage
 * Bearsarks (3) [200]: Savage

== (Warlord) Volva [115]: Ancestors' Blessing
 * Huskarls (5) [270]: Skald

== Vargyr Lord [175]: Massive Frame, Wild Beasts
 * Fenr Beastpack (3) [140]:
 * Goltr Beastpack (3) [160]:
 * Goltr Beastpack (3) [160]:
 * Goltr Beastpack (3) [160]:


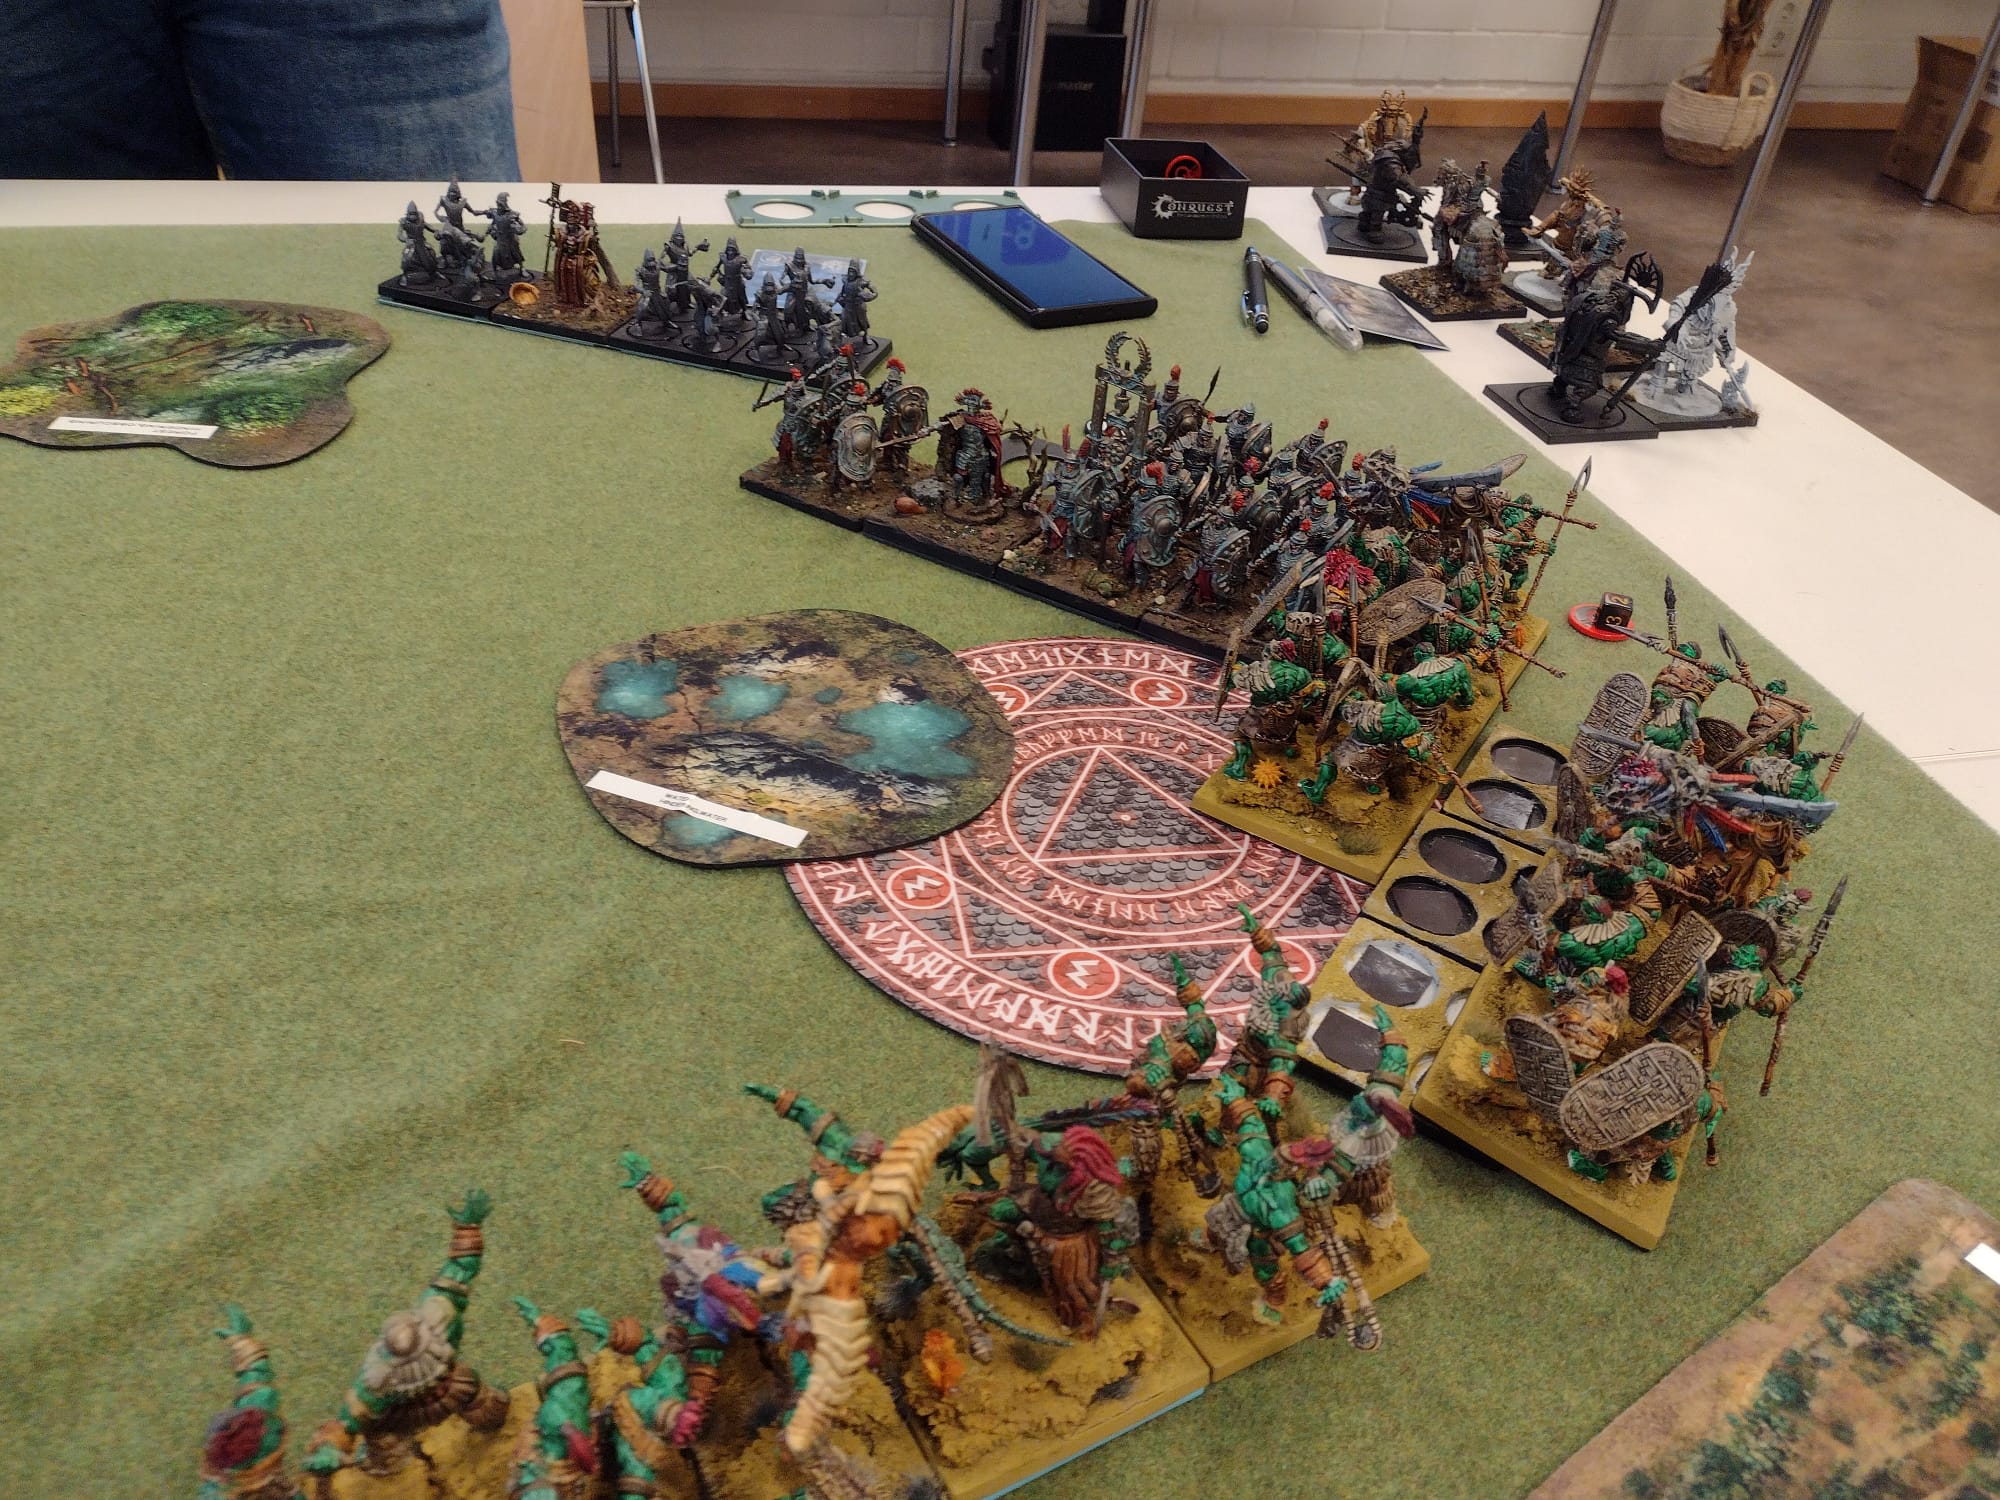
Leider lief es anfangs nicht gut für ihn. In Runde 1 und 2 kamen seine Reinforcements sehr unglücklich. Ich dagegen hatte dank Flank früh viel Druck auf dem Feld. Da ich mit weniger Widerstand rechnen musste, zerstörte ich zwei Marker früh und konnte mich dann entspannt zurückziehen. Der Plan war, ihn langsam an meiner vordersten Reihe abprallen zu lassen, denn auf Echelon konnte er einen Rückstand nur aufholen, wenn er meine Zone kontrollierte oder mir zumindest den Zugriff darauf verweigerte.


Runde 3 kam seine Armee endlich fast vollständig aufs Feld. Doch meine Position war bereits stabil: Slinger auf jeder Flanke und in der Mitte, dazu jeweils beide Veterans und Braves auf einer Seite, unterstützt von je einem Apex. Eigentlich wollte ich symmetrisch spielen, aber während des Spiels verlagerte Konrad den Fokus zunehmend auf die rechte Flanke. Ich entschied, dass dort doppeltes Veteranen Bleigewicht konstruktiver wäre.

Konrad bewegte sich vorsichtig nach vorn und blockierte mich mit einem Move-Charge, damit ich nicht mit den Hunting Packs zwischen seine Truppen rutschen und seine Armee zerschlagen konnte.

In Runde 4 zeigte sich, dass seine Positionierung nicht optimal war. Viele seiner Truppen behinderten sich gegenseitig, und dazu kam weiteres Würfelpech, als ein paar Berserker nur eine Handvoll Schaden an einem Apex verursachten. Unter dem konstanten Druck meiner Liste fiel es ihm zunehmend schwer, sich so zu stellen, dass ich mir nicht regelmäßig zwei Karten für eine nehmen konnte.


Ich wurde dann etwas zu gierig und unvorsichtig, wodurch ich ein Veterans Regiment unnötig abschenkte, ich hatte übersehen, dass seine Volva sowie ein paar Gotrl noch nicht aktiviert waren. Das war lästig und als Konrad in Runde 5 dann einen Charge mit den Berserkern auf die 6 versuchte, ihn schaffte und meine Slinger nur zwei Schaden machten, sah ich ganz kurz die rechte Flanke brechen. Aber die bis dahin erlittenen Kartenverluste waren zu schwer, und am Ende war es ein klarer Sieg für mich.

Von außen wirkte es vielleicht einseitiger, als es tatsächlich war, aber das Momentum war früh auf meiner Seite. Ich hoffe auf ein baldiges Rematch, mit besserem Start, etwas mehr Glück und neuen Ideen auf beiden Seiten wird das bestimmt wieder spannend.


Spiel 2 gegen Kilian „Rawr“ Sieutat-Lacaze (100k, Frankreich NTR 1)

Das zweite Szenario war „Melee“, und wie die regelmäßigen Leser meines Blogs wissen, halte ich dieses Szenario für das beste für die Hundred Kingdoms. Dementsprechend war es nicht besonders erfreulich zu hören, dass ich in Runde 2 gegen Frankreichs Nummer 1 und einen der besten Hundred Kingdoms-Spieler der Welt spielen durfte. Ein Matchup, das ich eher für das Finale erwartet hätte. Auch Kilian hatte jedoch wenig Interesse daran, auf einer Killpoint-Mission gegen meine Liste zu spielen

Assault on Winnenden [2000/2000]
The Hundred Kingdoms

== Mounted Noble Lord [155]: Dynastic Ally, Tourney Champion, Eccentric Fighting Style
* Household Knights 5 [270]:
* Household Knights 3 [160]:

== Crusading Noble Lord [155]: Elysian Fragment, Get in Position
* Men at Arms 8 [270]: [Veteran]

== Warlord Imperial Officer [130]: Art of War
* Mercenary Crossbowmen 3 [110]:
* Hunter Cadre 3 [160]:

== Chapter Mage [100]: School of Water, School of Fire, Talented
* Mercenary Crossbowmen 3 [110]:

Kilians Liste hat neben absurd viel Beschuss vor allem eine beeindruckende Reinforcement-Kurve, die besser war als meine. Abgesehen von zwei Regimentern konnte er mit fast allem punkten. Ich war mir unsicher, wie ich sinnvoll Karten tauschen sollte, vor allem, weil er mit den Rittern und der Supremacy des Imperial Officers einfach mehr Angriffsreichweite als ich hatte. Dafür hatte ich die Slinger, drei Regimenter und ihr theoretisches Potenzial waren ebenfalls furchteinflößend.

In Runde 1 kamen nur meine Reinforcements, während Kiki bereits alles auf dem Feld hatte. Das war ein Problem, also entschied ich mich, mein Hunting Pack etwas zurückhaltender einzusetzen und meine Slinger eher aggressiv. Ein Gebäude trennte eine der großen Zonen vom restlichen Spielfeld, und ich beschloss, diese Seite zunächst zu ignorieren. Es war klar, dass Kiki mit der Kavallerie in den Wald vor seiner kleinen Zone wollte, und meine Slinger hatten das Potenzial, eine Crossbow-Einheit mit einem einzigen Treffer auszuschalten. Das wusste er natürlich auch und stellte seine Crossbows zusammen mit Charakteren fast an den Rand des Spielfelds, um keine Punkte zu verlieren. Die anderen beiden Crossbows positionierte er etwas weiter vorne, aber so weit links, dass sie für mich uninteressant waren.

Runde 2 baute sich sein Kartenvorteil weiter aus. Ich hoffte, dass er mich in Ruhe ließ, bis der Rest meiner Armee kam, aber ich konnte auch nicht genau einschätzen, mit welchem Plan er mir ins Gesicht springen wollte, Ende Runde 2. Immerhin bekam ich ein weiteres Hunting Pack, beide Veterans und ein Mal Braves. Dank meiner vorne stehenden Slinger konnte ich theoretisch beide großen Zonen erreichen. Ich entschied mich, die linke Zone mit den Veterans zu holen, da sein Beschuss nicht weit genug reichte. Ansonsten achteten wir beide darauf, uns keine dummen Fehler zu erlauben. Meine Braves gingen in die Mitte, seine beiden Reitereinheiten ebenfalls. Dann tauchte ganz rechts plötzlich der Man-at-Arms-Block auf. Ich wusste, dass er den hatte, da wir online schon über seine Liste gesprochen hatten, aber irgendwie hatte ich ihn verdrängt. 8 Man-at-Arms mit Charakteren sind auf dem Feld schon ziemlich imposant.


Eigentlich sollte meine zweite Veterans-Einheit auf die Flanke gehen, aber ich entschied mich, sie doch links zu positionieren. Bei Kilian kam nur noch wenig in Runde 3 und 4, und ich sah die Möglichkeit, auf dieser Seite langfristig durchzubrechen. Immerhin ging ich mit einem Punkt Vorsprung in die nächste Runde.

In Runde 3 kamen meine letzten Slinger und ein Apex. Mit dem Conquest-Chant versuchte ich, ein paar Glückstreffer gegen die Ritter im Wald zu landen, aber D4, RR6 und Obscuring waren zu viel, und ich machte nur zwei Schaden. Wir positionierten uns weiter, holten beide kleine und große Zonen. Er konnte seinen Kartenvorteil nicht wirklich ausnutzen, da ich meine Slinger weit nach unten positionierte, um eventuelle Vorstöße noch bestrafen zu können. Die letzten Slinger marschierten auch auf der linken Seite auf, damit ich mit doppelten Veterans und Slinger die Crossbows und Hunter einfach überrennen konnte.

In Runde 4 kam endlich der Rest meiner Armee, und wir hatten bisher keine Verluste. Diese Runde war eher langwierig und drehte sich nur ums Positionieren. Wir unterhielten uns, aber keiner von uns wollte den ersten Schritt machen, vor allem, weil sich unsere Positionen nahezu vollständig abdeckten. Riskante Ini-Würfe und Charges waren keine Option, also spielten wir konservativ und ruhig.


Bis ich in Runde 5 endlich ein bisschen Glück hatte  bzw. Kiki unglücklicherweise Pech. Endlich versagten ein paar Schutzwürfe, und beide Ritter-Einheiten verloren je zwei Stände. Links starb eine Crossbow-Einheit, und die Hunter nahmen beträchtlichen Schaden. Kiki revanchierte sich, tötete ein Hunting Pack und fast hätte er wirklich etwas ins Rollen gebracht. Aber wir hatten als letzte Karten immer noch die wichtigsten, sodass wir keine Gelegenheit hatten, den anderen in die Zange zu nehmen. Bemerkenswert war, dass jeder, der die Initiative gewann, stets den Gegner anfangen ließ, weil es einfach keinen Grund gab, selbst anzufangen.

Dann brach ich den letzten Widerstand auf der linken Flanke. Ich machte konstant 6 Schaden an den Man-at-Arms durch den Wald und tötete die kleinen HHKs. Kilian entledigte sich meines Screens aus Hunting Packs, und seine HHKs gingen mit einem Move Charge auf den ersten Apex, während der zweite durch einen fehlgeschlagenen Charge gebrochen war. Das musste er machen, weil von der linken Seite eine Einheit Slinger und Veterans begann, sein Backfield aufzuräumen. Ich konnte ihn nun von beiden Seiten in die Zange nehmen. Der Apex blieb wie erwartet stehen und überlebte den Clash in der Folgerunde, was das Spiel schließlich entschied.

Alles in allem war es taktisch als auch mental eine echte Herausforderung der knappste Sieg den ich an diesem Wochenende errang.


Spiel 3 gegen Guillaume "BillyZeKid" Verdier (City States, Frankreich NTR 2)

Gilli ist der Organisator des ITC und hatte im Winter ein größeres Turnier mit Spire gewonnen. Zum Glück hatte er meine Hassfraktion nicht dabei und stattdessen City States. Die Liste finde ich an sich ziemlich solide: 12 Karten plus Strategic Deck, potenziell fünf Karten in Runde 1. Eine Kombination aus doppelter Agema, Sacred Band für Heilung und Chariots erzeugt viel Druck und ist recht schnell. Besonders die Loose Formation der Selinoi ist für mich als Hundred Kingdoms-Spielerin immer ein echtes Problem. Aber heute war ich nicht mit 100K unterwegs. Ich hatte Dinos  dabei. 14 Karten, fünf sichere Karten in Runde 1, und Slinger, denen Loose Formation herzlich egal ist. Mit Hundred Kingdoms hätte ich vermutlich ziemlich gelitten, aber mit meiner Liste fühlte ich mich klar im Vorteil. Ich hatte in den letzten Wochen viel gegen City States getestet und wusste: Wenn ich rankomme, platzt alles. Zugegeben, das galt auch für meine eigenen Truppen, aber wir spielten Divide and Conquer. Das bedeutet, alles muss in die Mitte. Und wer dort steht, wird vom Druck der Beschussregimenter zerflückt. Das die Wadrhun alle 5 oder 6 Leben hatten half da natürlich auch noch mal doppelt. 

The City States [2000/2000]

== (Warlord) Aristarch [140]: Standard of Last Oration, Expert Scouts
 * Selinoi (3) [130]:
 * Selinoi (3) [130]:
 * War Chariots (Flogobollon//Skorpios) (2) [260]: Skorpios

== Polemarch [160]: Aristia, Blades of Eakides, Disorienting Strikes
 * Agema (5) [295]: Andromachos, Sacred Band Veterans
 * Agema (4) [245]: Andromachos, Sacred Band Veterans
 * Minotaur Haspists (3) [180]:
 * Sacred Band (3) [190]:

== Mechanist [90]: Hephaestian Alloys
 * Thorakites (4) [180]: Minotaur Thyrean Auxiliary

In Runde 1 kam bei Gilli nur eine Einheit Selinoi, bei mir kam alles. Ich stellte wie gewohnt mein Hunting Pack in die Mitte, Slinger jeweils auf die Flanken und ein Regiment in die Mitte. Seine Selinoi standen ebenfalls mittig und zu weit vorne.  In Runde 2 hatte ich dann das Vergnügen, sie zu erschießen, trotz ihrer Loose Formation. Dafür bekam ich in dieser Runde nur meine Pflichtauswahlen, also die beiden Veterans. Gilli brachte seine gewählten Agema mit Polemarchen, dazu die zweiten Selinoi mit Aristarch und die Kühe. Seine Streitwägen kamen mittig und links, der Rest wurde auf die rechte Flanke verschoben. Vermutlich, weil ich weiter breit aufstellte.

Runde 3 kam der Rest der Armeen, nur ein Apex fehlte bei mir noch. Der erste und später auch der zweite Apex landeten natürlich rechts. Aber richtig gekämpft wurde noch nicht. Wir standen uns gegenüber, schossen ein wenig, ich auf Kühe und Streitwägen, er auf mein Hunting Pack, das irgendwann auch fiel. Dann schoben sich seine Kühe in ein Regiment Slinger, was mich in eine gute Position brachte, um in der nächsten Runde mit meinem Hunting Pack die Flanke zu bedrohen. Dann trauten sich aber noch seine Agema mit Polemarch in die Zone und zeigten dem ersten Apex die Flanke. Dieser stand zwar im Wald, aber Gilli sah das Matchup so schlecht, dass er auf Iniative pokern wollte.


In Runde 4 zündete Gilli seine Supremacy, aber mein Apex durfte fairerweise anfangen. Zwei von fünf Stands Agema fraß er direkt. Die wollten aufgrund anderer Bedrohungen keinen Reform machen und verursachten kaum Schaden. Meine Slinger wurden, wie erwartet, von den Kühen überrannt und starben im Gegenzug durch das  Hunting Pack. Die Streitwägen versuchten, meine Veterans aus der Zone zu schießen, aber mit 6 Leben pro Stand waren sie einfach zu widerstandsfähig. Einer der vielen Punkte die aktuell bei Wadrhun meiner Meinung nach geändert werden sollten. Dann brachten die Selinoimeinen Apex auf 10 Leben. Ich ließ die kleinen Veterans die Agema auslöschen, kassierte dafür später den Gegenangriff der Thorakites, aber Dank des großen Lebenspolsters war mir das egal. Der zweite Apex kam mittlerweile auf dem Feld an und stellte sich in Charge – Reichweite und die verbliebenden Slinger drückten beide Streitwägen auf die Hälfte ihrer Leben. Die Attrition lief insgesamt sehr gut für mich. Ich hatte eigentlich erwartet, dass die Thorakites in den Apex gehen, aber stattdessen hatte Gilli die Sacred Band mit Move Charge in ihn geschickt. Vorallem weil das von seiner Aktivierungsreihenfolge nicht paßte. Damit setzte er wieder  auf die Initiative in der nächsten Runde.


Vater liebte mich also bekam ich die Initiative. Der Apex fraß zwei Stands der Sacred Band und überlebte auch den Rückschlag. Der zweite Apex ging in die Thorakites, die mit den Veterans kämpften, und auch diese wurden langsam zermürbt. Meine Veterans mit Cheifthain kamen endlich gegen die Streitwägen an, was das Ende für sie einläutete. Insgesamt nahm ich fast seine ganze Armee in dieser Runde vom Feld. Gilli hatte noch seine zweiten Agema, die versuchten, mich zu umkreisen und in die kleine Zone vorzurücken, aber es war zu spät. Ich hielt konstant zwei bis drei Zonen und hatte einen massiven Kartenvorteil.

Tag 1 war vorbei und ich war erschöpft, aber auch zufrieden mit meiner Leistung. Zwei Spiele auf Englisch und drei starke Gegner, das war definitiv kräftezerrend. Für den nächsten Tag hoffte ich auf einen etwas leichteren Gegner, aber im Bracket gab es niemanden mehr, der das versprach. Also gingen wir erstmal alle zusammen in ein gemütliches Gasthaus und genossen die süddeutsche Küche.


Spiel 4 gegen Maphi "Farnir" Werner (Wadrhun, NTR 7 Deutschland)

Maphi, der Sieger des letzten Wormser Turniers, scherzte, dass ich mir gestern beim Essen einen „einfacheren“ Gegner gewünscht hätte und nun habe ich ihn bekommen. Ein humorvoller Kommentar, der jedoch seine starke Selbstironie unterstrich, da er mit einer Liste antrat, die meiner sehr ähnlich war.

Double Time [2000/2000]
The W'adrhun

== Warlord Chieftain [100]: Conquest

* Veterans 4 [220]:
* Veterans 3 [170]:
* Braves 3 [130]:
* Slingers 3 [150]:

== Predator [100]: Death
* Braves 3 [130]:
* Slingers 3 [150]:

== Matriarch Queen [110]: Death, Apex Master

* Warbred 3 [180]:
* Warbred 3 [180]:
* Apex Predator 1 [190]:

Das Szenario war Breakout, und das Gelände teilte unsere Aufstellungszonen. Dadurch wurde je eine  äußere Zone weniger attraktiv, was das Spiel bereits in der ersten Runde etwas prägte. Wir plauderten ein wenig, und während ich mit dem Mirror-Match gut vertraut war, hatte Maphi damit noch keine Erfahrung. In der ersten Runde stellte er seine Slingers sehr passiv auf, was mir die Möglichkeit gab, nach vorne zu rücken und meine Reinforcementline weit nach vorne zu schieben. So konnte ich bereits in der zweiten Runde die beiden äußeren Zonen punkten, was Maphi etwas überraschte. Er hatte das von der Seite kommende Spiel bisher als nicht besonders relevant eingeschätzt, und ich nahm mir die Zeit, ihm zu erklären, ab welcher Entfernung es meiner Meinung nach sinnvoll wäre, diese Strategie zu berücksichtigen. Gleichzeitig räumte ich den Missionsmarker aus dem Weg und behielt meine Position auf Abstand um quasi zwei Runden durchzupunkten bevor er damit anfing. Um das zu verhindern stellte Maphi auf der rechten Flanke mit doppel Warbread auf und blieb ebenfalls auf Abstand. Doch dann warf er, fast schon ein wenig todesmutig, seine ersten Veteranen mit Chiefthains in Reichweite von 18" zu meinen Slingers. Diese Gelegenheit nahm ich dankend an Erschoss einen und stellte ein Hunting Pack in Auto Charge für die nächste Runde.


Ich durfte als Erste agieren, und das Hunting Pack nahm Maphis Veteranen regelrecht auseinander und schickte sie von der Platte. Völlig aus der Fassung gebracht vom Verlust seines Ankers im Zentrum, schickte er mir die Warbreads mit Move Charge auf der rechten Seite in meine Veteranen. Die Hälfte dieser Warbreads fiel jedoch den Slingern zum Opfer. Ich stellte anschließend meinen ersten Apex hinter die Veteranen, um sie abzusichern, und versagte bei der Clash-Aktion, den letzten Warbread zu eliminieren. Das war ärgerlich, aber egal da ich die Zone verweigerte.   Auf der anderen Seite verursachte ich einige Schadenspunkte an seinen zweiten Veteranen, die jetzt das Zentrum decken sollten und seine Queen, die mit Heilung auf einem Apex reitend unterwegs war, marschierte auf der linken Flanke voran. In erster Linie um die Veterans zu heilen, aber insgesamt zu weit vorne. Sie bzw der dicke Dino stand genau in die Reichweite meiner Slinger für die nächste Runde. 


In der darauffolgenden Runde begann Maphi, und wir tauschten Veteranen gegen zwei Regimenter Warbread aus. Das war zwar in Ordnung, aber ich wusste, dass ich das noch besser hätte ausspielen können, aber ich wurde gierig und machte Fehler. Als die Slinger den Apex der Queen dann in einer Schussphase auf einen Leben reduzierten und die nächsten die Sache beendete hatte ich einen absurden Kartenteil. Damit konnte ich es wagen mich schließlich in die mittlere Zone mit den Veterans zu stellen, um Druck auf seine beiden Slinger-Regimenter auszuüben. Dadurch fühlte Maphi sich gezwungen, mir seine Braves entgegenzustellen. Stellte er sich dadurch so zu, dass meine Slinger auf seine schießen konnten und mit Fire and Advance immer außerhalb seiner Reichweite blieben. Wir spielten noch einen halben Zug, doch Maphi gab schließlich auf, als ihm klar wurde, dass er keine Punkte mehr machen konnte und ich seine Truppen vollständig auslöschte.

Somit war der Weg frei für das Finale, und da Nino den letzten Franzosen besiegt hatte, war klar, dass der Sieg definitiv für unseren Club enden würde.


Spiel 5 gegen Nino "Torsul" Beck (Old Dominion, NTR 2 Deutschland)

Liebe Leserinnen und Leser, der Moment auf den wir alle gewartet haben. Das große Finale in Winnende, und mein Gegner war kein Geringerer als der unvergleichliche, legendäre Mr. Bonegolem in Körperform und Geist: Nino Beck. Sieger des letzten Bedburger Turniers, ITC 2025 Champion und seit über 20 Jahren mein treuer Freund, was wohl am ehesten mit einem ausgeprägten Stockholm-Syndrom zu erklären ist.

Nino kennt meine Liste in- und auswendig. Wir spielen mehrere Partien im Monat, auch wenn seine aktuelle OD-Liste noch nicht gegen meine grüne Welle angetreten war. Gespielt wurde Head to Head und seine drei Lights mit Loose Formation waren für mich im Grunde zehn Punkte auf dem Silbertablett. Entweder stellte er sie so defensiv, dass sie nichts taten, oder ich räumte sie ab und bekam 10 Punkte. Selbst Nino schätzte das Matchup auf diesem Szenario als 65 zu 35 zu meinen Gunsten ein, solange ich meine Slinger nicht unnötig verliere. Das Problem mit den Slinger ist momentan groß, da sie Loose Formation Regimenter einfach in der Luft zerreißen mit effektiver Range und Torrential Fire auf 18“.  Hoffentlich wird das mit dem Update Ende des Monats angepasst.

Rheinhippoteetisch unter Tierschutz [1995/2000]
The Old Dominion

== Warlord Strategos [165]: Legio I 'Primigenia', Skofnung, Eternal Discipline
* Praetorian Guard 5 [260]: Standard Bearer
* Athanatoi 3 [170]:

== Hierodeacon [90]:
* Buccephaloi 3 [220]:
* Cultists 3 [90]:
* Legionnaires 3 [115]: Standard Bearer, Optio

== Archimandrite [110]:
* Moroi 3 [180]:
* Cultists 3 [90]:
* Legionnaires 3 [115]: Standard Bearer, Optio

Das Spiel startete. Ich bekam alle meine Lights bis auf die dritte Slinger, Nino bekam alle seine. Ich ging direkt aggressiv nach vorne, trotz der Moroi, denn ich wollte die so früh wie möglich unter Druck setzen. Nino stellte seine Kultisten mit Loose Formation auf die rechte Seite zur großen Zone, während Moroi und die anderen Kultisten zentral platziert wurden. Er entschied sich also das ganze aggressiv zu spielen.

In Runde zwei gab es für beide Seiten je eine zusätzliche Auswahl. Nino kriegte doppel Athanatoi und Präts und ich doppel Veterans und Braves. Ich durfte anfangen. Meine Slinger schafften es nicht mehr als zwei Schaden auf die Moroi zu machen. Im Gegenzug wurde ein Hunting Pack fast komplett ausgelöscht, das andere räumte immerhin die Moroi ab. Ninos Archie versagte beim Versuch, das volle Hunting Pack zu verwunden, und so entschieden sich seine Kultisten dazu, das schwer angeschlagene Pack für Punkte vom Tisch zu nehmen. Die anderen Kultisten rückten mutig vor, damit der Hiero zaubern konnte, doch meine Slinger waren schneller. Sie erschossen fast das ganze Regiment und zogen sich zurück. Nino blieb damit ohne Ziel. Der Rest der Runde war einfaches aufmarschieren. Meine beiden Veterans Regimenter kamen auf der Seite der großen Zone, Nino stellte seine Prätorianer direkt gegenüber. Zwei Regimenter Athanatoi erschienen in der Mitte und bewegten sich Richtung meiner kleinen Zone, wo bereits Braves warteten.


In Runde drei durfte ich beginnen. Mein Hunting Pack erschlug die Kultisten des Archimandrites. Die anderen versuchten sich zurückzuziehen, aber durch Conquest konnten meine Slinger sie noch einholen. Der Punktestand war 10 zu 2. Ich würde vermutlich das Hunting Pack in der Mitte an die Athanatoi verlieren, aber Nino konnte schlichtweg nicht genug Stands in die Zone bringen, um zwei Braves mit Charakter zu übertreffen. Wir handelten den Rest der Runde zügig ab. Die kleinen Dinos starben, aber mittig kamen die Kühe und meine beiden Apexe auf das Feld um den Tanz später fortzuführen. Da es für Nino nicht gut lief, entschloss er sich zu einem Doppel-Move mit den Athanatoi, um einen Reinforcementwurf in der nächsten Runde zu erzwingen und mir vielleicht eine Slinger-Einheit zu nehmen. Da er den Bonus hatte war die Idee gut, aber ich begann erneut wie auch in den folgenden Runden. Meine Slinger löschten die erste Einheit Athanatoi, und der Apex fraß fast das zweite Regiment alleine auf. Die Kühe griffen meinen Apex an, schafften es aber nicht, ihn im Clash zu töten. Im Gegenzug ging der zweite Apex direkt in ihre Reihen und erschlug zwei Kühe. Und war beiden klar, dass das Spiel an dieser Stelle gelaufen war, da ich noch drei Regimenter Slinger hatte, die einfach überall einen Berg an Treffern verursachen werden. Trotzdem spielten wir weiter und wie erwartet brach die Flanke unter der Wucht zusammen.

Es regnete Schaden aus allen Richtungen. Die Prätorianer hielten sich noch am längsten und beide Veterans Regimenter fielen ihnen zum Opfer. Das kostet sie selbst auch zwei oder drei Stands, aber als mein Chiefthain zu einem Duell gezwungen wurde, erschlugen sich beide Generäle gegenseitig. Damit verschwand auch der RR6 Buff der Prätorianer und mit Braves auf der einen Seite und einem Apex in ihrer Flanke wurden sie schließlich komplett vom Feld geräumt.


Damit gewann ich das zweite deutsche Zweitagesturnier. Nino sicherte sich den zweiten Platz. Gilli wurde Dritter, Kilian Vierter und auf Platz fünf landete Gregor mit seinen Sorcerer Kings.

Nino und ich waren mit dem Ergebnis rundum zufrieden. Nicht nur, dass wir ein taktisch starkes und faires Finale gespielt haben. Es war auch das erste Mal, dass die Franzosen bei einem Turnier in Deutschland, an dem sie teilnahmen, nicht den Sieg davontrugen. Dass unser Club sowohl Platz eins als auch zwei belegte, rundete das Ganze perfekt ab.

Samstag, 22. März 2025

Turnierberichte vom ersten World Event am Teutoburger Wald

Moin zusammen,

am 15.03. lud Tycho zum World Turnier nach Bielefeld ein und natürlich wollten wir uns das nicht entgehen lassen. Nach ein paar kurzfristigen Absagen standen wir am Ende immerhin noch zu zwölft bereit, um den Tag mit ein bisschen gepflegtem Würfeln zu verbringen. Eigentlich war der Plan, dass wir einfach locker-flockig nette Listen einpackten. Aber unsere Vorstellungen von nett gingen weit auseinander also gab es doch die große Keulen. Also habe ich eben meine freundliche Wadrhunliste aus Frankreich wieder rausgeholt. Die ist zwar nicht optimal (ich würde wirklich gerne mehr Veterans spielen), aber Lupus kommt einfach nicht aus dem Quark und will mir die City States Schilde mitzubringen. 


Meine Liste:

== (Warlord) Chieftain [130]: Conquest, Vision

  • Veterans (3) [170]
  • Veterans (3) [170]
  • Slingers (3) [150]

== Predator [100]: War

  • Braves (3) [130]
  • Hunting Pack (3) [120]
  • Apex Predator (1) [190]
  • Slingers (3) [150]

== Predator [100]: War

  • Braves (3) [130]
  • Hunting Pack (3) [120]
  • Apex Predator (1) [190]
  • Slingers (3) [150]

Mit dieser Liste habe ich jetzt zwei Einzelspielerturniere gewonnen – und mit unserem Team sogar die ITC. Eigentlich würde ich gerne einen Predator gegen einen Winglord tauschen und die Veteranen etwas größer machen, aber das wird wohl frühestens Mitte des Jahres was. Die Schwächen der Liste gleicht aktuell meine Übung ganz gut aus. In den letzten Wochen habe ich sie einfach ein paar Dutzend Mal auf den Tisch gebracht.


Spiel 1: Die Sache mit dem Mettbrötchen

Für die erste Runde stand eigentlich noch eine Forderung gegen Nauthi aus, da dieser eine unerhörte Behauptung zum norddeutschen Nationalgericht Mettbrötchen mit Preiselbeeren geäußert hatte. Aufgrund dieses kulinarischen Fauxpas hatte sich Nauthi im Vorfeld einen festen Platz in der Bestrafungszone verdient. Ich ging davon aus, dass wir uns auf dem Maelstrom-Szenario treffen würden, um ihm diese Strafe gebührend zu verabreichen. Ich war vorbereitet, die Nords oder Hundred Kingdoms zu bekämpfen, auch wenn das Szenario nicht meine erste Wahl war.

Doch dann stellte sich heraus, dass Tycho die Szenarienreihenfolge auf der Turnierseite und im Discord unterschiedlich angegeben hatte. Am Ende spielten wir Head to Head. Und natürlich hatte Nauthi seine Duisburg-Liste mitgebracht – die ihm beim 26-Spieler-Event den Sieg eingebracht hatte. Auf Maelstrom wäre das sicherlich spannend geworden, aber auf Head to Head? Das war eine andere Geschichte.

Wir hatten diese Kombination in den letzten Wochen schon mehrfach geübt, und ich wusste genau, wie ich meine Liste aufstellen musste. Die Kombination aus wenigen Zonen und einem starken Fokus auf Killpoints spielte meiner Liste einfach in die Karten. Ich hatte die richtige Taktik im Kopf und war zuversichtlich, dass ich Nauthi in dieser Konstellation das Leben schwer machen konnte.

Nauths Liste

== (Warlord) Volva [100]:

  • Raiders (3) [155]: Captain, Shield Biter

== Konungyr [150]: Rjóða, the Red Bringer

  • Bow-Chosen (3) [200]
  • Bow-Chosen (3) [200]
  • Mountain Jotnar (1) [210]
  • Sea Jotnar (1) [240]

== Vargyr Lord [135]: Massive Frame

  • Fenr Beastpack (3) [140]
  • Fenr Beastpack (3) [140]
  • Goltr Beastpack (3) [160]
  • Werewargs (3) [170]

Das Gelände in Bielefeld war für jeden Tisch identisch: Zwei Teiche in der Mitte, die Hindering und Water waren, sowie einige weitere Geländeobjekte, die wenig Einfluss auf das Spiel hatten. Die Seitenwahl war ebenfalls irrelevant.

Zu Beginn von Runde 1 bekam ich die komplette Liste meiner Verstärkungen, während Nauthi nur eine seiner Lights erwürfelte. Das verschaffte mir den Vorteil, dass ich in Ruhe seine Aufstellung beobachten und meine Regimenter gezielt positionieren konnte. In Runde 2, als er keinen weiteren Reinforcementwurf schaffte, war für uns beide klar: Das Spiel war so gut wie entschieden. Ein 12:6-Kartenstand in Runde 2 ist immer schwer zu drehen, und ich machte mir mit meinen Slingern sofort seine Werewargs zu eigen und wartete, dass der Rest seiner Truppen endlich ins Spiel kam.


Doch diese erschienen nur tropfenweise. Dadurch hatte Nauthi keine Möglichkeit, Druck aufzubauen. Er versuchte, sich zurückzuhalten, aber ich konnte ihm fast nach Belieben ins Gesicht springen, ohne dass mir dadurch Nachteile entstanden.

Als in Runde 3 schließlich seine Bow-Chosen ins Spiel kamen, stellte ich als letzte Aktivierung direkt zwei Hunting Packs daneben. In Runde 4 gewann ich die Initiative und konnte sogar beide Bow-Chosen-Regimenter vernichten, weil ich richtig geraten hatte, welches Regiment er für den Gegenschlag oben hatte. Zwar konnte Nauthi noch zwei Regimenter von mir ausschalten, aber bis auf die Raider und Jotnars fiel alles, und es blieb ihm kein Raum mehr, um ins Spiel zurückzukommen.


Nun wollte ich gegen Nicki spielen. Doch dann das: Nick hatte sich im ersten Spiel gegen Daniel (Serphios im Discord) einfach auf den Rücken gelegt. Mein Wunsch, mich runterzupaaren, wurde nicht erfüllt, und so würde ich, zu Nicks Freude, nicht mit ihm spielen. Ich würde jetzt sagen, das war ziemlich enttäuschend, aber es wird viele überraschen: Ich mag Spire als Gegner wirklich gar nicht. Fühlt sich für mich immer sehr unfair an dagegen zu spielen. Nun, hätte ich das gewusst, hätte lieber die nette Kirche oder Sorcerer Kings eingepackt. Dieser Gedanke zerschlug sich jedoch, als ich die Liste meines zweiten Gegners, Marvin aka Murrml, sah. Drei Streitwägen. Nauth kommentierte das nur mit Karma.


Spiel 2: City States Streitwägen

Mit Marvin hatte ich schon mal in Beckum gespielt  und das war knapp, weil ich mich da fast selbst ins Aus geschossen habe. Seine Liste ist ziemlich ähnlich zu dem, was Lupus gerade öfter spielt und mit dem er mir auch gerne mal ordentlich die Ohren lang zieht. Daher hatte ich ordentlich Respekt. Die Liste ist grob aus dem Kopf, also keine Garantie auf Fehlerfreiheit:

The City States
== (Warlord) Aristarch [90]:
• Phalangites (6) [295]: Dorilates, Sacred Band Veterans
• Thorakites (3) [120]:
• War Chariots (1) [130]: Skorpios
• War Chariots (2) [260]: Skorpios

== Polemarch [180]: Aristia, Blades of Eakides, Combined Arms Drills
• Hephaestian (1) [240]:
• Talos (1) [260]:
• Thorakites (4) [205]: Andromachos, Minotaur Thyrean Auxiliary
• Agema (4) [220]: Sacred Band Veterans

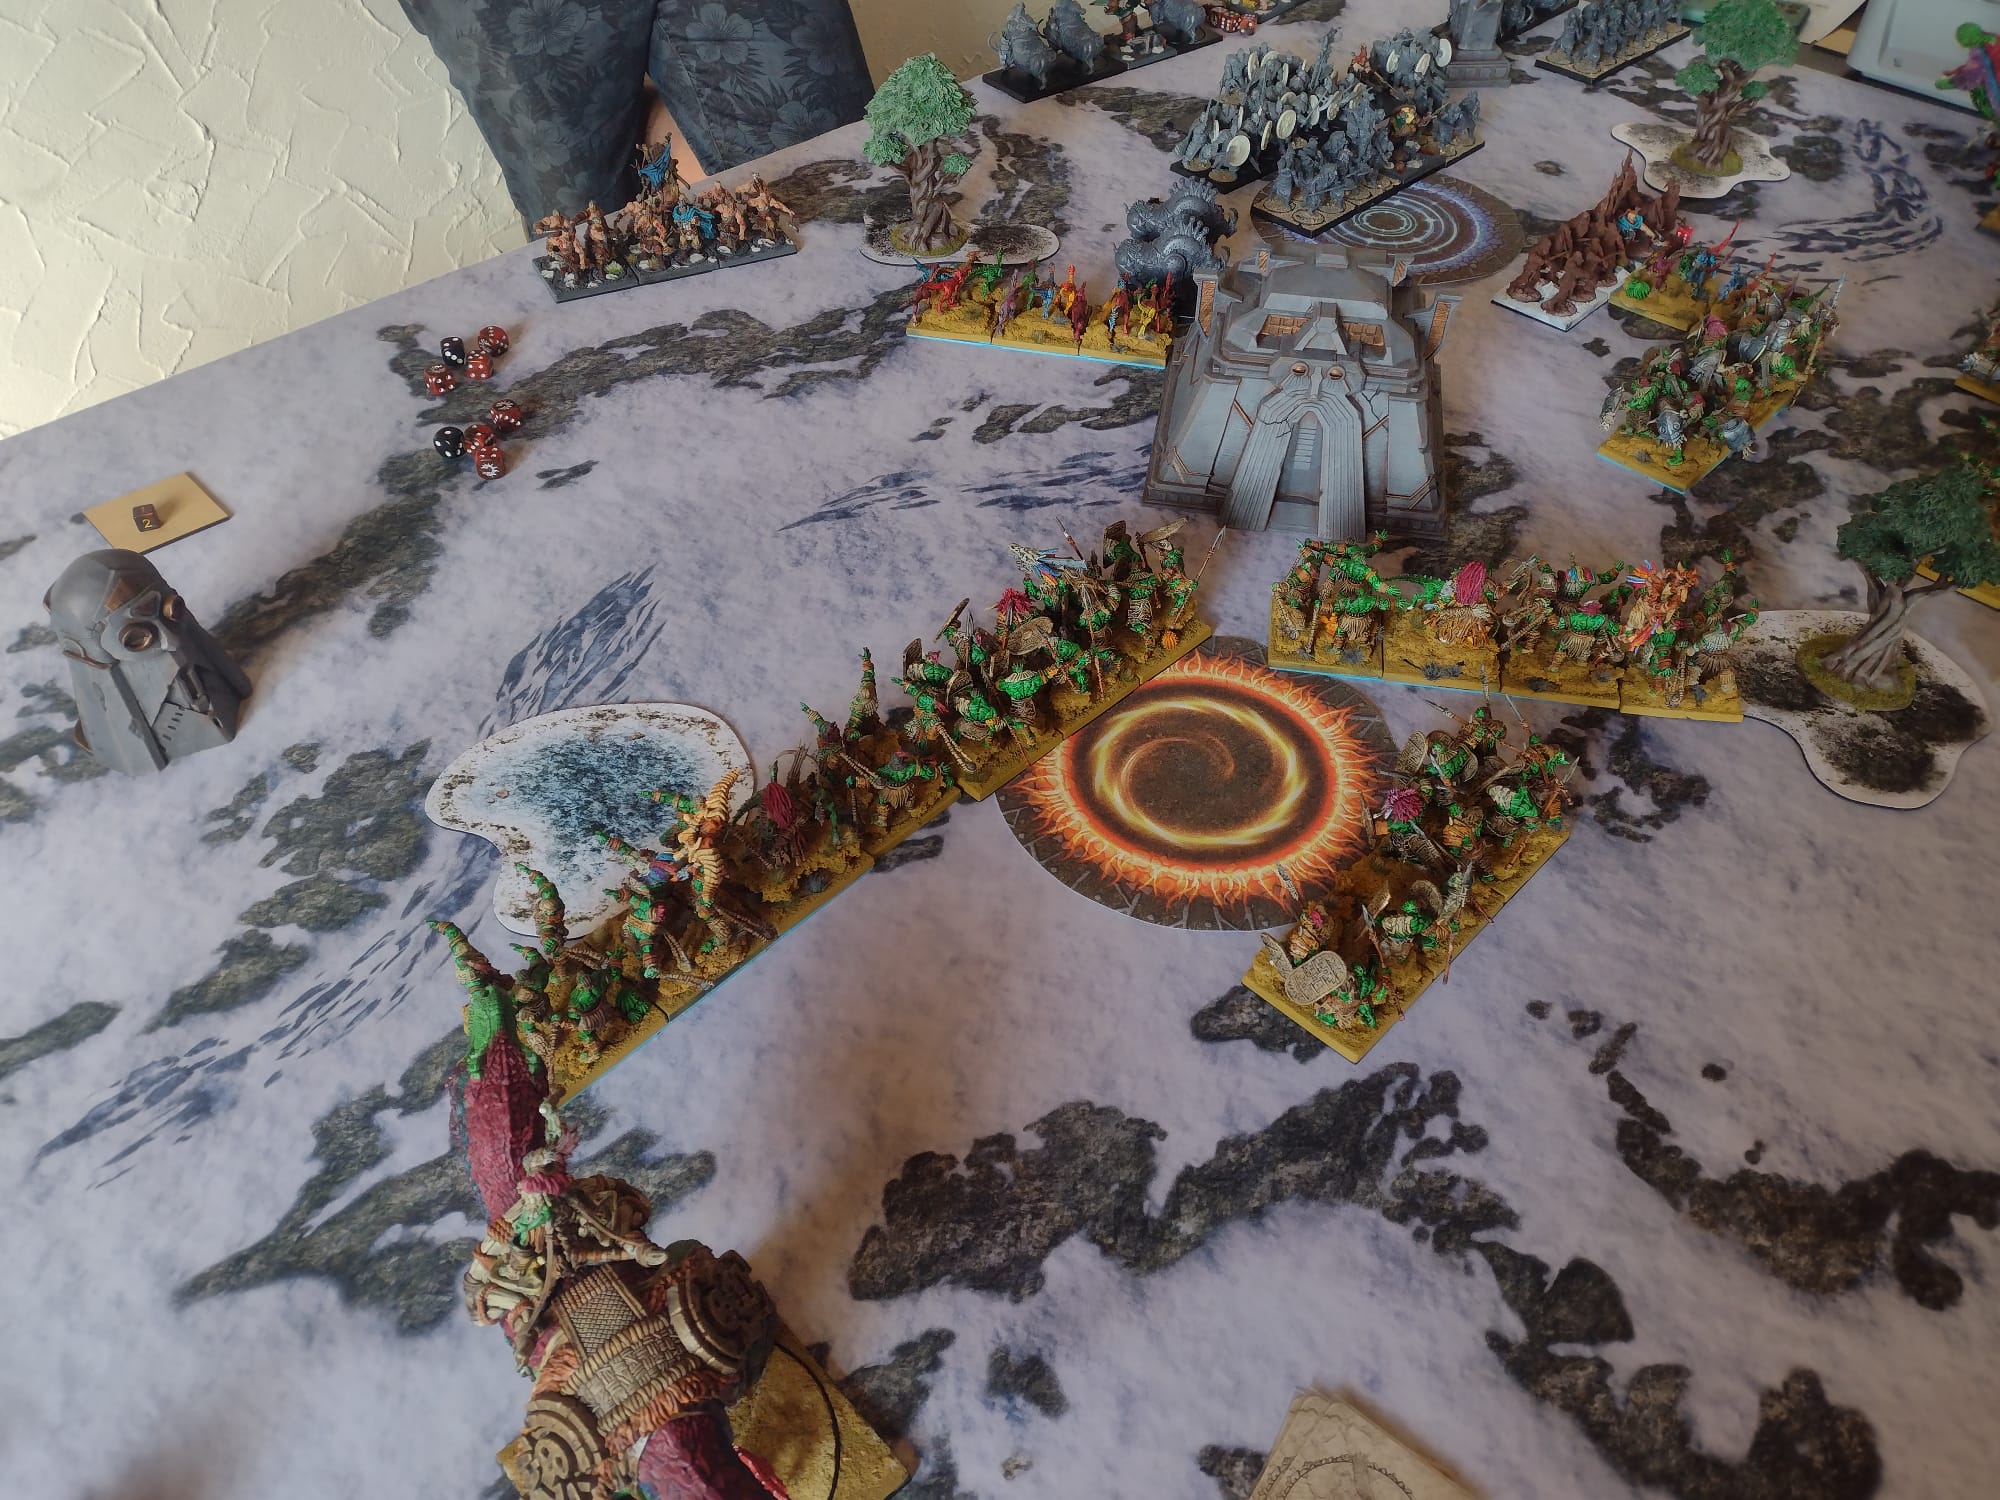
Gespielt wurde Divide and Conquer, und in der Mitte teilte ein Gebäude das Schlachtfeld. Sowas mag ich immer, weil es einen zu taktischen Entscheidungen zwingt.

Runde 1 begann mit einem nicht so tollen Setup: Bei mir kamen nur die automatischen Auswahlen, bei ihm beide Lights. Das war irgendwie nicht beruhigend. In Runde 2 gab es dann auch nur die Veterans und die letzten Slinger, aber er holte sich die drei Streitwägen und die Phalangites. Die Agema wurden nicht erwürfelt. Marvin entschloss sich, die rechte Flanke aufzugeben und alles auf der linken Flanke zu sammeln, um dort einen Vorstoß zu starten. Erst dann fiel mir auf, dass er ohne die Sonderregel Initiative spielte – was mich tatsächlich freute, weil das seine ganzen Movement Buffs auf Aristarch Supremacy und Aristia auf einmal ziemlich einschränkte.

Gegen Ende der Runde zog er die Thorakites in die Zone, und meine ersten Slinger konnten bequem auf sie feuern. Doch er hatte die dritten Thorakites vergessen, die gerade aus der Reserve kamen und das Regiment dann broken machten. Er schaute sich dann an und erklärte mir, dass sein eigentlicher Plan war, sich nur mit einer Einheit Slinger zu beschäftigen und vorzupunkten. Jetzt war er jedoch in genau der Situation, die er eigentlich verhindern wollte.

Ab dem Punkt spielte Marvin vorsichtiger und hielt sich brav außerhalb der 22". Ich tat das Gleiche. Ich schob langsam Regimenter in die Zonen und ließ den Streitwagenbeschuss stoisch über mich ergehen. Auf der rechten Flanke gingen die Slinger dann einfach doppelt nach vorne, und auch wenn da einsam und allein ein Talos auftauchte, merkte dieser schnell, dass er keine Lust hatte, gegen Slinger, Veterans und doppelte Braves mit Hunting Pack zu kämpfen. Also gab Marvin die Flanke komplett auf und stellte alles auf die andere Flanke. Unebehelligt fraß mein Hunting Pack die letzten Thorakites, und auf der anderen Seite nahm das andere Hunting Pack einen Streitwagen auseinander. Ich begann, mich bequem abzusetzen.

In Runde 5 versuchte er dann doch, einen Vorstoß zu wagen, aber der Kartenvorteil war zu groß, und meine Slinger hatten mittlerweile das Gebäude umrundet und schossen den Phalangites fröhlich in die Flanke. Der halbherzige Vorstoß endete, bevor er richtig begonnen hatte, und Marvin gab auf.

Auf den anderen Tischen siegte Serphios mit einer Old Dominion Liste, die nahezu identisch mit der von Nino war. Übrigens wurde Nino von Nick getablet, nachdem dieser sein Mojo wiedergefunden hatte. Fin aus den Niederlanden setzte sich gegen Uziel durch, der mit einem riesigen Forcegrown Drones Block und Beschussunterstützung spielte. Sowohl Fin als auch Serphios versuchten, mich zu dodgen, aber das Finalspiel sollte schließlich Old Dominion gegen meine lieben Dinos sein.


Spiel 3: Dicke Old Dominion Blöcke

Mit Daniel hatte ich bisher noch nicht das Vergnügen, aber ich wusste, dass er im Online-Turnier ziemlich solide gespielt hatte. Er war unter anderem schon gegen Uziel und Nino angetreten. Seine Motivation für unser Spiel... nun ja, wenn ich es nett ausdrücken wollte, war sie eher überschaubar. Er wusste genau, was ich dabei hatte und Maelstrom als Szenario. Zehn Karten gegen meine Dinos, vier Charaktere auf dem Feld, und ein Szenario wo man fast unmöglich Punkte aufholt. Gut, da wäre ich auch nicht sonderlich begeistert. Maelstorm sowie Forsight gehören einfach aus dem Szenario-Pool gestirchen.

Seine Liste hatte ich noch grob im Kopf, also ohne Gewähr:

Old Dominion

==
(Warlord) Mounted Strategos [155]: Skofnung, Gladiator
• Kataphraktoi (5) [360]: Standard Bearer, Hetairos
• Legionnaires (3) [100]:

== Hierodeacon [90]:
• Cultists (3) [90]: 
• Buccephaloi (5) [370]:

== Xhiliarch [145]: Legio I 'Primigenia', Aventine Armor
• Praetorian Guard (5) [260]: Standard Bearer

== Strategos [135]: Semion of the Legion, Cuirass of Hazlia's Shadow
• Athanatoi (5) [250]:

In den ersten beiden Runden lief es für beide Seiten ziemlich rund. Ich bekam meine Verstärkungen, er brachte alles auf den Tisch, bis auf die Legionäre. Das machte mir mehr Sorgen, als ich zugeben wollte. Vor allem seine Supremacy vom Strategos hing mir wie ein Damoklesschwert über dem Kopf. Daher ging ich es vorsichtig an. Lieber keinen unüberlegten Vorstoß, sondern ihn zu blöden Charges verleiten, die er nicht nahm. Stattdessen blieb er außerhalb meiner Reichweiten, verlor ein Pferd und ich sicherte mir die erste Zone. Ich dachte kurz darüber nach, direkt auf zwei zu gehen, aber ich roch die Supremacy in Runde 3 und hatte keine Lust, dass mir dann die Welt um die Ohren fliegt. Besonders nicht mit Prätorianern auf meiner rechten Flanke, die ich nicht so einfach loswerden würde, und Athanatoi plus Kataphraktoi links, die mir die Veterans aus dem Lendenschurz hauen könnten. Zwei Slinger standen zwar da, mussten sich aber so blöd stellen, dass ich es lieber bleiben ließ.

Also blieb das Spiel weiterhin... sagen wir: bedächtig. Runde 3 kam fast alles, nur ein Apex ließ sich noch Zeit. Serphios und ich stellten mehr als wir spielten. Ich schoss ein bisschen auf Pferde und Kühe rum, aber so richtig Lust, mich in Reichweite zu stellen, hatte ich auch nicht. Zwei Zonen reichten mir. Daniel war sichtlich genervt und ehrlich gesagt: Ich kann es ihm nicht mal übelnehmen. Was ihm da gegenüberstand, war einfach kein schöner Anblick. Irgendwann schob ich dann zwei Hunting Packs vor. Eins in die Reiter, eins in die Kühe. Das Ziel war simpel: nächste Runde die Supremacy Überleben und am besten beide Regimenter mit Slingern töten.

Oder auch nicht. In Runde 4 vertauschte ich meine Kartenstapel, Daniel vergaß seine Supremacy und es passierte gar nichts. Meine Hunting Packs wurden zerlegt, seine Einheiten standen weiter da rum, und ich baute meinen Punktevorsprung einfach aus. Spannend geht anders. Da hatte ich genug und schickte meinen Apex Move + Charge durch das Hindering Terrain direkt in seine Reiterei. Der zweite Apex stellte sich artig neben die Athanatoi. Auf der anderen Seite chargten die Braves die Prätorianer in die Flanke. Die hauten dann, wenig begeistert, ein bisschen auf die Braves ein das war’s.

Runde 5: Daniel zündete seine Supremacy. Die Athanatoi wollten den Apex neben sich weghauen und ließen ihn mit einem Leben stehen. Sein Bruder fraß in aller Ruhe seine Pferde auf – bis auf eins. Ich schob die zweiten Veterans zurück, um nächste Runde den Athanatoi schön in den Rücken zu fallen, und meine Slinger erledigten das letzte Pferd. Damit war die linke Flanke abgehakt. In der Mitte kamen die Kühe aus dem Wald und chargten meine Veterans. Ein Stand ging, aber die Antwort war ein Slinger-Trommelfeuer und ein Clash der Veterans, der sie fast komplett in die ewigen Weiden schickte. Zwei Zonen mehr für mich.

Runde 6: Ich erschlug die letzte Kuh. Die Legionäre wollten noch den Apex umhauen, aber das klappte natürlich nicht. Die Athanatoi schafften es immerhin, den angeschlagenen Apex auszuschalten. Meine Slinger machten kurzen Prozess mit den Legionären. Und dann wurde die Zeit knapp – wir brachen ab.


Fazit

Fin verlor sein Spiel, und damit blieb am Ende nur ich mit drei Siegen übrig. Turniersieg! Daniel wurde Zweiter, Marvin Dritter – Glückwunsch an die beiden!

Am letzten März Wochenende sind wir in Bedburg auf einem Turnier und dort gibt es wieder undurchsichtigen Wälder. Meiner Meinung nach macht das klassische Beschusslisten deutlich weniger attraktiv… oder?. Ich weiß jedenfalls, dass Nick schon mit dreifach Marksmen plus VCI liebäugelt – oder Underspire mit doppel Marksmen. Also werde auch ich, bis zum (völlig unvermeidlichen) Nerf für Slinger und Marksmen im April, diese oder eine ähnliche Liste nochmal ausführen. Die Armee sieht halt einfach verdammt cool aus auf dem Feld. Da kann man nix sagen.


Freitag, 21. Februar 2025

Nords Review: Tier List and Beginner Insights (english)

UPDATE APRIL 2026: Due to the latest errata and the rework, the evaluations of the units have been updated. The tier list now reflects the current state as of April 2026. Since I have revised all regiments and characters, I am not marking them in red, because otherwise the entire text would be red.

Hello everyone,

after the City States article was very well received and many Nords players asked me if I could do something similar for their faction, I got together with Lars, Uziel and Drizzt and discussed it with them. The result is a tier list for the Nords, but before we jump straight into the rankings, a few words for context.

Tier lists are always a double edged sword. On the one hand, they help you get a quick overview and a rough sense of direction. On the other hand, they are often highly subjective and tend to ignore nuances. Especially in a game like Conquest, where synergies play a huge role, a unit that seems weak in one setup can truly shine in another. The boundaries between the categories are therefore fluid, and some placements are definitely open to debate.


Tier-List

Evaluating units in Conquest is often complex and heavily influenced by your local playgroup. Many units only reach their full potential in combination with others and are difficult to assess in isolation. For this analysis, I assume that each unit is able to realize its full potential within an army. The goal is not to identify the most mathematically cost efficient unit, but to evaluate each option in terms of its role and impact. As a result, this is inherently subjective.

  • S-Tier: Units that are considered overpowered due to their rules or efficiency. Must picks that improve almost any list.

  • A-Tier: Excellent units that shine in their roles and often form the core of competitive lists.

  • B-Tier: Solid and balanced units with clear strengths and weaknesses. They perform their role well. Most regiments and characters should fall into this category.

  • C-Tier: Units that are played less frequently and fall somewhat behind compared to alternatives. They are usable, but less efficient.

  • D-Tier: Units that are barely playable or in need of a rework. In newer factions, this is sometimes because they are waiting for synergies with future options.


Faction mechanics

Ice, Flesh and Blood (the classic)

The only rule that has remained unchanged: Nords regiments are still considered Inspired when charging through hindering terrain. This remains essential for maintaining the army’s offensive power, no matter how cluttered the battlefield is. Important: you still cannot make impact hits when moving through hindering terrain. But the Nords also have an answer for that

Prophecy Unfulfilled

As soon as an enemy is engaged in melee, all other friendly units gain +2 inches to their charge range against that target. The change that now all Nords regiments benefit without exception makes positioning even more interesting and is often overlooked by opponents. Important: this stacks with the Tribal Tactics, which we will get to next

Tribal Tactics (the core of the rework)

This is technically the biggest area of change in the rework. The tactics are no longer permanently active, but are now triggered once per game at the end of the Supremacy Phase. They apply to all Mortals and Exalted and give the army a massive push in a specific direction for one round, while two Warlords and certain items can allow more frequent use.

  • Direct Assault! (Relentless Blows): Simply more damage. Rolling a 1 to hit generates additional hits. This is used in the round where you have already tied the enemy down and now want to finish the job.

  • Draw Them In! (Tenacious +1): The defensive option. Increases Tenacious by +1 up to a maximum of 2. This brings Bearsarks, Ulfhednar and Raiders up to Tenacious 2, and overall removes a significant amount of incoming damage from the Nords.

  • Take The Flanks!: Two effects depending on whether you want to shoot or strike in melee

    • Melee: Units charging a flank or rear can treat the distance roll as a fixed 4, removing risk, and gain Fury

    • Ranged: When making ranged attacks, units gain Opportunist. For Bow Chosen, this means a dramatic increase in efficiency in the right round, something they previously lacked


Characters

Blooded, B-Tier and C-Tier as Warlord

The Blooded is currently in a difficult position and suffers from competition with the Vargyr Lord. Since both have very similar warbands and can join the same regiments, the Blooded usually comes out behind, especially as the Vargyr Lord’s mainstays are significantly more attractive.

His justification mainly comes from two factors: first, you can only field two Vargyr Lords, and second, in a Half Blood list he is the only way to unlock Stalkers. Giving him a bow himself is a nice option, but usually ends up being a points trap. As a result, he is more often seen in Werewargs or in his signature unit, the Trolls. There, he provides offensive support with a solid package of 5 attacks, Clash 4, Cleave 2 and two impact hits.

As a Warlord: the healing for Half Bloods is nice, but since Nords are largely glass cannons, it is often not enough to survive the counterattack. The free reform after destroying a regiment would theoretically be extremely strong, but it is tied to actually wiping the enemy out. Against large blocks or very resilient units, this mechanic quickly falls flat, which makes his Warlord qualities obsolete in many matchups.


Jarl, A-Tier and B-Tier as Warlord

For a lean 100 points, the Jarl is a solid support piece for the Nords. He not only unlocks excellent warbands, but is also, alongside the Fenr, the only source of Flank, completely independent of the chosen Warlord. In addition to the reliable option of bringing in two medium regiments, this allows, for example, a unit of Bearsarks to enter the battlefield consistently in round 3. His profile is solid and can be expanded with items in both a supportive and offensive direction. My personal favorite is Reyngeir, the God Spear: Cleave 2 to really push damage through, and Parry, which prevents enemy rerolls, are useful more often than you might expect.

As a Warlord: his Supremacy embodies the ABC theme, Always Be Charging, that many players have wanted and that Para Bellum has consistently implemented since the last book in winter 2024. He may not be as flashy as the Konungyr, but he makes the army reliable. The fact that he can trigger all three Tribal Tactics over the course of the game removes the guesswork from the strategy. The real selling points, however, are the bonus to reinforcements and his activated ability: this turns the army into an absolute powerhouse for one round with Fearless, Juggernaut and Inspired. It is simple, but on the table it is often exactly what wins games. The automatic 5 inch charge from Juggernaut combined with the additional hits from Relentless Blows is perfect for players who enjoy an aggressive, all in playstyle.


Konungyr, A-Tier, and A-Tier asWarlord

In the past, the Konungyr was often only a necessary choice to gain access to Bow Chosen or Ice Jotnar. Those times are gone, and today he is one of the undisputed kings of the Nords. His melee profile remains impressive with 7 attacks at Clash 4, Cleave 1, Terrifying 1 and 3 impact hits. The Terrifying ability in particular significantly enhances his entire regiment as long as he is in direct contact.

In terms of equipment, the Figurehead of the Naglfar is often taken to grant his regiment, usually Steel Chosen or Huskarls, Tenacious 2 against shooting. A very dangerous variant is the combination with Rjooa the Red Bringer. This not only grants him 2 additional attacks and Impact 2 for the regiment, but also, and most importantly, Always Dies Fighting. Placed in Bow Chosen, this creates a threat level that forces every opponent to think twice before committing to that melee. New and tactically very interesting is the Mark of the Beast, which turns his regiment into Half Bloods and opens up synergies like Promise of Flesh for a Vanguard move. This is something every Nords character can do.

As a Warlord, his Supremacy Ruler of Manheim, a name I quite like, is simply brutal. He may trigger an activated Tribal Tactic at the end of each Supremacy phase, as long as it is not the same one as in the previous round. Since most Mortals already have Tenacious 1, they can be pushed to Tenacious 2 every second round or simply deal significantly more damage with Relentless Blows. That would already be strong enough, but the activated part of the Supremacy takes it even further. For one round, all regiments and characters benefit from all three tactics at the same time. This even affects units like the Goltr and creates an absolute power spike that often overwhelms the opponent completely. Important, in the following round no tactic may be chosen.


Jotnar Seidr, C-Tier

The most expensive model in the Nords. Offensively he is solid with 12 attacks, Cleave 2 and Terrifying 1, but for 260 points on his own he is not necessarily outstanding. His true strength, however, lies in his defence: Defence 3, Evasion 2, Hardened, 20 wounds, Fearless and Tenacious 1 make him the most durable model in the faction. In addition, he always counts as six stands, which makes him perfect for controlling mission zones.

One downside remains his warband structure: he must always be played with a Mountain Jotnar as a mainstay, which further increases the cost of the package. His 8 impact hits with Brutal Impact 1 are impressive, but since he lacks Unstoppable, it is often difficult to reliably deliver them with a charge clash. At least he now benefits from Prophecy Unfulfilled, which makes charges significantly more reliable. One of the main reasons he is often seen alongside the Shaman is the possibility of gaining Unstoppable through him.

When it comes to weapon choice, there is plenty of room for personal preference. Even though he only lands in C tier here, two Seidr usually form the backbone of a 7 Jotun list, an extremely stable and deadly setup for any opponent. If he were not a character but a regular regiment, he would likely see the table much more often.


Shaman, B Tier and A-Tier as Warlord

The Shaman’s greatest strength is his cost efficiency combined with an excellent warband. He provides access to all Jotnar and also brings Raider, Ulfhednar and Bearsarks into the army. He is particularly well suited to Raiders and offers valuable support for these fast units.

His spell list is solid, even if it does not perfectly align with every current top pick in the Nords. Nevertheless, both Jotnar and Werewargs benefit enormously from him: with Reshape Destiny he activates a 12 inch aura that allows friendly regiments to reroll charge dice, an enormous help for the lumbering giants who lack Unstoppable. In addition, he can effectively limit enemy shooting with Blurred Vision, although the spell suffers from scaling, which can be somewhat frustrating at times. His biggest weakness remains his melee profile. While it is fitting for an old man, it feels weak for a Nord. Despite this, his warband remains a very strong option for lists built around a combination of Jotnar, Werewargs and Fenr.

As a Warlord: his new Supremacy Skývald is the main reason why the Shaman is currently much more present on the table again. The passive part, which allows him and his regiment to ignore difficult terrain, is already a strong bonus. The real strength, however, lies in the ability to choose two activated effects per game.

Snæstormur is an absolute game changer. It could effectively be summarised as: the opponent does not score in round 2. Since most lists are designed to move exactly 15 inches in the second round to secure objectives, the reduction to March value prevents them from reaching their goals. The Nords often end up scoring uncontested as a result. The effect is devastating against armies that rely on Juggernaut or fixed charge distances. You can comfortably position yourself 11 inches from the enemy; if you lose the Supremacy roll, you trigger the ability and the opponent is left with nothing. With Hregg, weakened enemy regiments can also be removed to open lanes for your own attacks, while Niflmire often means a secure win against pure shooting armies.


Vargyr Lord. B-Tier and S-Tier as Warlord

The Vargyr Lord initially appears unassuming, but proves himself with a solid melee profile, a good number of attacks and Cleave 1. A small weakness remains his Resolve 3. Since he can join any Half Blood regiment, the choice of unit is largely a matter of preference. However, the best options remain Werewargs and Goltr, as he significantly enhances both.

In addition to the Massive Frame variant for extra punch, the combination with the Figurehead of the Naglfar is extremely popular, as it makes the regiment almost immune to light and medium ranged attacks. Due to the recent “pig update”, we also increasingly see armies with multiple MSU units of Goltr (3 stands), or even large blocks led by a Vargyr Lord. The main reason he is currently so highly rated by many players, however, is his warband: since Werewargs, Fenr and Goltr are all mainstay, it allows for an extremely agile core.

As a Warlord: his Supremacy Wild Beasts is a powerhouse for aggressive lists. The fact that Half Bloods can now also trigger their impact hits through hindering terrain removes key defensive positioning options from the opponent. The activated ability grants the entire pack Shock and Fury, massively increasing damage output at the decisive moment.

Most players also invest the additional 30 points into Call the Hunt, since both the Vargyr Lord and the Blooded have lost the Flank special rule. This upgrade compensates for that loss very effectively: each round you may automatically bring in an additional Half Blood regiment. Properly built, this creates an army that hardly ever needs to roll for reinforcements and hits with overwhelming offensive force.


Volva, A-Tier and A-Tier as Warlord

At first glance, their warband may seem average, but the option to now take Ulfhednar as Restricted is almost as strong as their spell list itself. From reliable healing and Blessed to Unyielding for their own regiment, they offer a defensive toolkit that is second to none. In current lists, they are therefore often seen in a large block of Ulfhednar. Combined with upgrades such as Wealth of a Hundred Raids for Dauntless and Coils of the Serpent for Evasion 2, this unit becomes a true nightmare for any opponent.

Especially under a Konungyr Warlord, this block turns into one of the most resilient and simultaneously most dangerous units in the entire faction. It is important to remember: due to the Savage rule of the Ulfhednar, the regiment can Clash twice, receives Relentless Blows from the Konungyr, and gains automatic Inspired from Dauntless. The result is a wave of attacks while still remaining solid defensively thanks to Tenacious and Blessed.

As a Warlord: the Volva used to be a staple in almost every competitive Nords list, mainly due to her ability to grant the entire army Evasion +1. Although she is currently seen slightly less often at the top tables, which is likely more due to players wanting to try out new tools, she remains one of the strongest Warlord options in the faction.


Regiments
Bearserks, A-Tier

The Bearsarks have become significantly cheaper and now start directly with Resolve 5. Their true potential is unlocked through the new Rampage rule: once the regiment takes damage, their Clash and Attack values increase by +1. This makes them extremely dangerous in prolonged engagements, as they become stronger precisely when they are wounded. Savage also remains relevant, now allowing the regiment to perform two Clash actions per round.

Although they have lost their bonus charge range, Vanguard and defensive buffs such as Evasion 2 from a Volva or the Tribal Tactics keep them among the most threatening offensive units in the faction. To compensate for their reduced mobility, an attached Jarl or Shaman can take the Occultist’s Charm: through Bloody Sacrifice the regiment suffers 2 wounds but gains +1 March. This not only immediately triggers Rampage but also helps the Bearsarks reach combat faster, where they truly belong.


Bow Chosen, B-Tier 

The Bow Chosen remain one of the more elegant ranged options in the game, but have become significantly more affordable. At 180 points per regiment, they are now available both to the Konungyr and the Jarl. While they no longer gain access to Opportunist automatically, their solid profile makes up for this loss.

Their real strength lies in the combination of Barrage 5 and Volley 3. Although their 14 inch range is limited, their damage output remains consistently high. Move and Shoot is usually the best option to keep pressure on the opponent. Many players overvalue Precise Shot, but statistically it is often more effective to rely on the high number of hits, especially against targets with Defence 1 to 3. When positioned well, they are the perfect tool to thin out enemy infantry before it can reach melee combat.


Fenr Beastpack, B-Tier

The Fenr Beastpack is one of the cheapest units in the Nords and comes with Flank, Fluid Formation and Vanguard 4, arguably three of the best rules in the game. This combination allows them to enter from reinforcements and immediately reach almost any objective, putting instant pressure on the opponent.

Offensively, they function as a classic glass cannon. Thanks to their built in Opportunist, they can be devastating on the flank, especially under a Vargyr Lord with Shock and Fury. They usually strike first and can eliminate light regiments immediately, but without the right Supremacy support they feel rather toothless. Once they are hit themselves, they fall extremely quickly. Loose Formation helps against shooting, but with Resolve 2 they rarely survive any serious counterattack. Their real value lies in controlling space for very few points, threatening zones, and forcing the opponent into mistakes.


Goltr Beastpack, S-Tier

Oink oink, Motherfucker! Even though they now cost 165 points, they remain ridiculously strong and one of the most powerful choices in the Nords. Anyone running a Vargyr Lord as Warlord turns this unit into the ultimate battering ram: through his Supremacy they ignore hindering terrain. In addition, they can be granted Shock (plus 1 Clash on the charge) and Fury (plus 1 attack on the charge) once per game.

Even without Supremacy, their raw stats are terrifying for knights and most other targets: Clash 3, 5 attacks, Linebreaker, 4 impact hits with Brutal Impact 1 and Trample 2. Any regiment they charge hits with such force that often nothing meaningful is left to strike back. Thanks to the faction rule Prophecy Unfulfilled (plus 2 inch charge against engaged targets) and their Unstoppable, they reliably reach whatever they aim at. With Defence 3 and 5 wounds per stand, they are tougher than almost anything else in the army and the perfect answer to heavy elite cavalry. Due to their low points cost, you can rarely go wrong with two or three regiments, as they fit wherever pressure is needed.

Although most players run them as MSUs (3 stands), larger blocks of five or more pigs led by a Vargyr Lord are also seen more frequently. This is the pure embodiment of impact cavalry that other factions can only dream of.


Hsukarls, B-Tier

Once rarely seen, they now have the potential to form the backbone of a Nords list. For a modest 150 points, you get a package of Defence 2 plus Shield (Defence 3 from the front), Bastion 1, and Untouchable, which grants rerolls of 6s in defence. With Movement 6 and 2 impact hits per stand, they perform statistically at a level close to Household Knights.

Their true strength is unlocked through Officer options. While the expensive Skald (+1 Resolve, Bravery) provides defensive stability, the new Thegn for 25 points is a real standout. He allows the regiment to permanently choose a Tribal Tactic, offering enormous tactical flexibility, either more offensive punch or stronger defence. Currently, they are most effective in large 7 model blocks. With a Konungyr, they become a dangerous offensive steamroller, while an attached Volva turns them into an anchor that can reliably hold the line in an otherwise glass cannon army.


Ice Jotnar, B-Tier

Previously the undisputed number one of the Nords, it has been repeatedly toned down over the years, but now it is back. With reduced points costs and regained Unstoppable, it is once again very interesting. Its raw stats are still a nightmare for any opponent relying on armour: 14 attacks with Cleave 3, Terrifying 1 and 6 impact hits provide a very solid damage output.

What truly sets it apart from other monsters, however, is its magic. With Priest 5 and a free spell action, it operates with great flexibility. Rime Storm in particular is a serious threat, because it causes double hits and, as a spell, naturally forces the opponent to take Morale tests. Defensively, it can boost itself to Defence 4 with Ice Armor. Combined with Resolve 4 and 16 wounds, this creates a massive problem on the battlefield that is difficult to take down even on the charge. Anyone looking for raw power combined with tactical magic cannot ignore the Ice Jotnar.


Mountain Jotnar, C-Tier

At 210 points, it is one of the most expensive medium selections in the game. Its main selling point is pure durability: with Defence 3, Hardened (1) and 18 wounds, it can take significantly more punishment than most other Nords regiments. Still, it is not an unkillable god and will eventually break under concentrated fire or heavy melee pressure.

Offensively it puts out a solid 12 attacks with Cleave 2, but it has one critical weakness: it lacks Unstoppable. This makes it heavily reliant on the faction rule Prophecy Unfulfilled, a Shaman buff, or simply favourable charge rolls. At least it now comes with a bit of humour: if it fails its charge, it angrily throws dirt at the enemy, dealing at least some ranged damage. In a pure Jotnar spam list, it serves as a stable anchor. Outside of that, however, it faces strong competition from other medium options that often bring better keywords or synergies for the same 210 points.


Raiders, B-Tier

Previously feared as scoring Light units, the Raiders had to be reinvented after losing that rule, and the result is excellent. For an effective 130 points (120 base plus 10 for the Captain), you get a tactical multitool. The Captain is not an optional upgrade but mandatory: he grants them Vanguard 4, allows them to use the Resolve of a nearby character (within 12 inches), and even lets them upgrade their class to Medium before the game. This is something you will want to use in most scenarios.

Large blocks of them are now rarely seen, but MSUs (3 stands) are common. As a Medium regiment, they score normally while retaining their high mobility through Vanguard. Defensively they are only okay with Defence 2, Evasion 1 and Tenacious 1, but Tribal Tactics compensate for that. They can become either durable or aggressively threatening, depending on the situation, which makes them frequent inclusions in Konungyr led armies.


Sea Jotnar, A-Tier

One of the most interesting options among the Jotnar, especially because of Fiend Hunter and its free shooting action. At first glance this may seem underwhelming, but in melee it makes a significant difference, effectively granting him seven additional attacks with rerolls and Armour Piercing 1. His combination of 13 attacks with Cleave 2, Terrifying 1 and the extra shooting makes him a perfect answer to Brutes and monsters.

Defensively, with Defence 3, Evasion 2, Resolve 3 and 16 wounds, he is still solid enough to absorb a reasonable amount of punishment. Especially in a meta with many Brutes and monsters, the Sea Jotnar can shine thanks to his narrow base and high damage output. He is often the first choice when I take a Heavy.


Stalker, B-Tier

Stalkers are first and foremost one thing: cheap. At 130 points, they offer far more than just a bit of ranged support. While many players see them only as mobile shooters with Barrage 4 and 16 inch range, they often overlook the potential hidden in the Half Blood keyword and the combination of Pathfinders and Opportunist.

Yes, they can shoot the enemy in the flank, but they can also surprise them in melee. With Clash 2, 4 attacks and Unstoppable from the standard bearer, they have a similar damage output to Raiders in the flank. Under a Vargyr Warlord they can even gain Shock and Fury, an option that is rarely used but ideal for cleaning up weakened units.

A tactical highlight is Pathfinder. A reinforcement line they establish is not easily pushed back by enemy units. Because of this, some players use them as a bodyguard for a Blooded with Vanguard 3 and a bow to push the unit 16 inches forward. Personally, however, I would rather use Werewargs or Raiders for that role.


Steel Chosen, B-Tier

Previously often dismissed as too expensive, the Steel Chosen with their new cost of 160 points are a real statement piece. Their key rule remains Linebreaker: even though Shields and Bastion are not present everywhere in the current meta, they cut through enemy defences like a hot knife through butter, especially in combination with the Relentless Blows from the Tribal Tactics. More than 18 hits per activation are not uncommon.

However, caution is needed: despite 5 wounds per stand, they remain a classic glass cannon. With Defence 2 and Evasion 1, they can collapse surprisingly quickly under concentrated shooting or fast counter charges. You can try to mitigate this through Tribal Tactics or a Volva Warlord, but at the end of the day they need to land the first strike to be worth their points.

To reliably deliver this massive output, they are often played under a Konungyr. A Jarl is also an excellent choice: his Supremacy grants them Juggernaut, ensuring they complete their charge. Whether the 20 points for the Thegn are worth it remains questionable.


Trolle, A-Tier

Trolls don’t win beauty contests, but they do win wars of attrition. You either love them as an unkillable pile of hit points or you struggle with their low Clash and defensive output. In the right setup, usually a large six-stand block supported by a healing Volva and a character leading them, they turn into a genuine swamp in which enemy regiments simply sink. Relying on Evasion 1 and Resolve 3 Oblivious, they lean heavily on sheer durability, shrugging off elite units with high Cleave, while struggling against a sustained hail of basic attacks. Eventually even Regeneration 6 reaches its limits.

Their real renaissance, however, comes from two factors: Dread and new mobility options. Simply by existing, they strip Inspired from nearby enemies, significantly reducing opposing damage output. Thanks to the Mastery Promise of Flesh, they can also gain Vanguard and move onto the battlefield much more effectively, solving one of their biggest historical weaknesses, their slowness.

Offensively they are not precise with Clash 2, but they bring Cleave 1, and under a Vargyr Lord Warlord they benefit from Shock (+1 Clash on the charge) and Fury (+1 Attack on the charge). Combined with rerolls from the banner, they no longer function only as an anvil but also contribute solidly to the offensive pressure in Half Blood armies.


Ugr, C-Tier

Let’s be honest: the Ugr are finally playable. In the past they were a liability, today they have a clear, if somewhat specific, role. The fact that they now have Unstoppable and, with Savage Retaliation, immediately strike back with their own impact hits on a frontal charge gives them an identity they simply did not have before. Units like Hunting Packs now think twice before charging them head on.

Still, due to the strong internal competition within the Nords, they will continue to be seen relatively rarely on the table. Their profile with Cleave 2 is solid, but only truly valuable when the meta shifts heavily towards heavy armour. In a world full of Evasion and high attack volumes, they often feel somewhat sluggish.

Their biggest advantage remains the price: 150 points for an MSU is painless. They will not win tournaments on their own, but you no longer punish yourself for taking them for flavour or as a cheap reactive stopper. They have moved from “total failure” to “solid filler option”.


Ulfhednar, A-Tier

The Ulfhednar have undergone one of the most impressive metamorphoses in the faction: from once being dismissed as a “Berserker knock-off” to becoming the absolute embodiment of the modern Nords death engine. The turning point of this transformation is the fact that they are now restricted to the Volva, who solves all of their previous problems.

Thanks to Movement 6, Banner and Vanguard 4, they surge an impressive 17 inches forward at the start of the game, immediately occupying key strategic zones or pressure points. However, their true dominance appears as a massive block under a Konungyr Warlord. Here the synergies interlock like perfectly meshed gears: while the Warlord provides Relentless Blows or Tenacious 2, the Wealth of a Hundred Raids upgrade grants Dauntless and thus automatic Inspired. Combined with Savage, which now allows the regiment to perform two Clash actions per round, this unleashes not a conventional offensive, but an industrial wave of destruction capable of simply overrunning most enemy regiments.

What truly turns the Ulfhednar into a nightmare, however, is their unexpected staying power. Where there once was a glass cannon now stands a defensive fortress: equipped with Coils of the Serpent for Evasion 2, combined with Blessed, Tenacious 2 and Resolve 5+, they perform extremely well even against high quality attacks. Even if the opponent manages to remove stands, they are immediately punished through Lethal Demise 3. When you add Volva healing on top, the unit becomes a mathematical trap: if it is not wiped out in a single, overwhelming commitment of force, it regenerates and then strikes back in its next activation with double Clash, mercilessly.


Valkyries, B-Tier

The Valkyries occupy a unique niche within the Nords. As one of the few regiments without Evasion, they are effectively designed as a classic defensive anchor with Defence 2, shields and Blessed. In theory, they could even gain Bastion through Ancestor’s Blessing, but in the current playstyle they are seen less as a passive stopper and more as an offensive grind block.

The key factor is not even their conversion into Half Bloods to benefit from a Vargyr Lord. The real threat comes from attaching a Volva with the artifact Rjóða, the Red Bringer, which grants the unit Impact 2. While this may seem underwhelming at Clash 3 at first glance, it becomes a major problem at scale. When a large block of 7 stands including a character crashes into the enemy with the last activation of the round from over 12 plus 1d6 inches away, it generates 12 impact hits thanks to Blessed. Anyone who survives that initial impact then faces a wall with Defence 3, Blessed and Resolve 4. Without a specialised “can opener” with high Cleave, this block is very difficult to remove in a single round.

With Tribal Tactics and Blessed, they also become offensively relevant. It often feels like many other Nords units currently do similar things slightly better, just in different ways. Still, the look on an opponent’s face when two large, durable Nords blocks, Valkyries, Ulfhednar and or Huskarls, suddenly appear on the table is priceless, especially if they were mentally prepared to face only glass cannons.


Werewargs, B-Tier

The Werewargs are the personification of chaos within the Nords ranks: fast, raid-like and psychologically extremely draining due to the combination of Terrifying, impact hits and a high volume of attacks through Flurry. Their biggest weakness remains the lack of Unstoppable in their base profile, which forces them into a rather rigid move charge pattern despite their impressive Movement 7 and limits their flexibility. This issue can, however, be elegantly solved by including a Shaman who provides the necessary direction, or by relying on an opponent careless enough to move within their reach.

Their true purpose is found as a spearhead under a Vargyr Lord. His Supremacy enhances them massively with Fury and Shock. While some players opt for a Blooded or Vargyr Lord with Vicious Assault for permanent Fury, most prefer Promise of Flesh (Vanguard 3). This allows the Werewargs to also reach the new Nords benchmark of 17 inches when entering the battlefield, often placing them deep inside the enemy army as early as round two.

Defensively they rely on Defence 2 (or Evasion 2 via a Volva Warlord) and a respectable Regeneration 5, making them surprisingly durable against light fire and half hearted counterattacks. Once broken, they do melt quickly due to their nature, but until that point they function as a resource sink. While they are often run in small MSU units of 3 stands, larger blocks of 5 or 6 are a nightmare for the opponent’s game plan. They pin important units for extended periods, are difficult to remove quickly due to healing, and punish every positional mistake with a high number of hits. They may not win the game on their own, but they buy exactly the time the rest of the army needs to secure victory.


Getting Started with the Nords

Getting started with the Nords

As already mentioned in the faction breakdown, I currently recommend starting with the 5th Anniversary Starter Set. It can be found for example at Kutami for around 128 EUR and offers the best price to value ratio. It forms a solid foundation for a Nords army and can be perfectly expanded with the new Super Charger, since this avoids duplicate boxes. If you want to expand the army further, you should also pick up a third character such as the Volva or the Shaman, as well as two boxes of Raiders, which can also be found at Kutami together for about 85 EUR. This brings you to roughly 324 EUR and results in a versatile and combat ready army that performs well on the table.

Alternatively, there is also the Iceborn Raiders army, a ready made 2000 point list with a slightly different focus. The main difference is that the individually built army allows you to gradually add new units over time, while the Iceborn Raiders are immediately ready to play as a complete force. Personally, I prefer the separate box approach because it offers more flexibility and lets you gradually buy what you actually want to play. However, both options are valid and each has its own appeal.

Not really recommended is the old two player starter box for the Nords. While it does provide a lot of units, it clashes with the 2025 Super Charger. As a result, you quickly end up with duplicate or even triplicate boxes that do not make much sense. However, if you can get it cheaply, it might still be worth considering, especially since the limited Konungyr is a real visual highlight for any collection.

Another interesting topic for Nords players is the proxy for the Ice Jotnar. In Germany, the Frost Giant from the Epic Encounters: Caverns of the Frost Giant box by Steamforged Games is often used for this. The size fits perfectly, and the miniature can be found for around 20 to 30 euros on eBay. So if you want a second Ice Jotnar, this is a cheap and visually appealing alternative. On German tournaments this proxy is officially allowed and is also frequently used. All you need in addition is a suitable card, which you can easily make yourself.

Here is the Epic Encounters box on the manufacturer’s website and here you can see the one I splashed with paint for Uziel.

Instead of writing an army list myself, I refer to the article series of undefeated army lists under Brave Humans with Sticks: Meta Stuff

best

Hanna