Game number five in the year 2024, and I'm facing off against Marcus "Pommesmann" or "Bremer" on Discord, who wanted to prepare for the tournament in Hamburg. This time with a bit more thought into deck building, as it was requested by a couple of people. I hope that can be well understood.
Goblinliste [2000/2000] - Goblins Classic
Relentless Drill
== Chapter Mage [105]: School of Fire, Focused, Arcane 1
Mercenary Crossbowmen (3) [105]:
== (Warlord) Imperial Officer [75]: On Your Feet, Fire First, Aim Later
Mercenary Crossbowmen (3) [105]: <-- IO
Steel Legion (3) [175]: Standard Bearer
Steel Legion (3) [175]: Standard Bearer
Imperial Ranger Corps (3) [120]:
== (Warlord) Mounted Noble Lord [110]: Weapon Master
Militia Bowmen (3) [75]:
Mercenary Crossbowmen (3) [105]:
Household Knights (3) [140]: Standard Bearer
Household Knights (3) [140]: Standard Bearer
== Mounted Noble Lord [110]: Weapon Master
Militia Bowmen (3) [75]:
Mercenary Crossbowmen (3) [105]:
Household Knights (3) [140]: Standard Bearer
Household Knights (3) [140]: Standard Bearer
The Goblin list consists of 17 cards and provides a balanced mix of mobility, ranged, and melee pressure. This makes them a nightmare for most opponents in many scenarios. I have also described the playstyle and basic concept of the archetype in the
MSU article ;)Canadin Horse Lord [2000/2000] - The Hundred Kingdoms
Veterans
== (Warlord) Mounted Noble Lord [180]: Olefant's Roar, Weapon Master, Tip of the Lance
Mounted Squires (3) [155]: Veterans, +1 Clash, Standard Bearer, Count Palatine
Mounted Squires (3) [155]: Veterans, +1 Clash, Standard Bearer, Count Palatine
Household Knights (5) [310]: Veterans, +1 Clash, Standard Bearer, Tourney Champion
Household Knights (3) [140]: Standard Bearer
== (Warlord) Priory Commander (Crimson Tower) [120]: Disorienting Strikes
Order of the Crimson Tower (3) [215]: Standard Bearer
Order of the Crimson Tower (3) [215]: Standard Bearer
Order of the Ashen Dawn (3) [255]: Standard Bearer
Order of the Ashen Dawn (3) [255]: Standard Bearer
Marcus also plays brave humans and the horse list from Maas of Bonktable. Marcus has already used this list in a tournament and was mostly satisfied with it. A few weeks ago, I wrote an article about this list titled "Cavalry Storm of the Hundred Kingdoms." It is a pure list with knights on ponies, generating a lot of pressure through their high mobility and impacts.
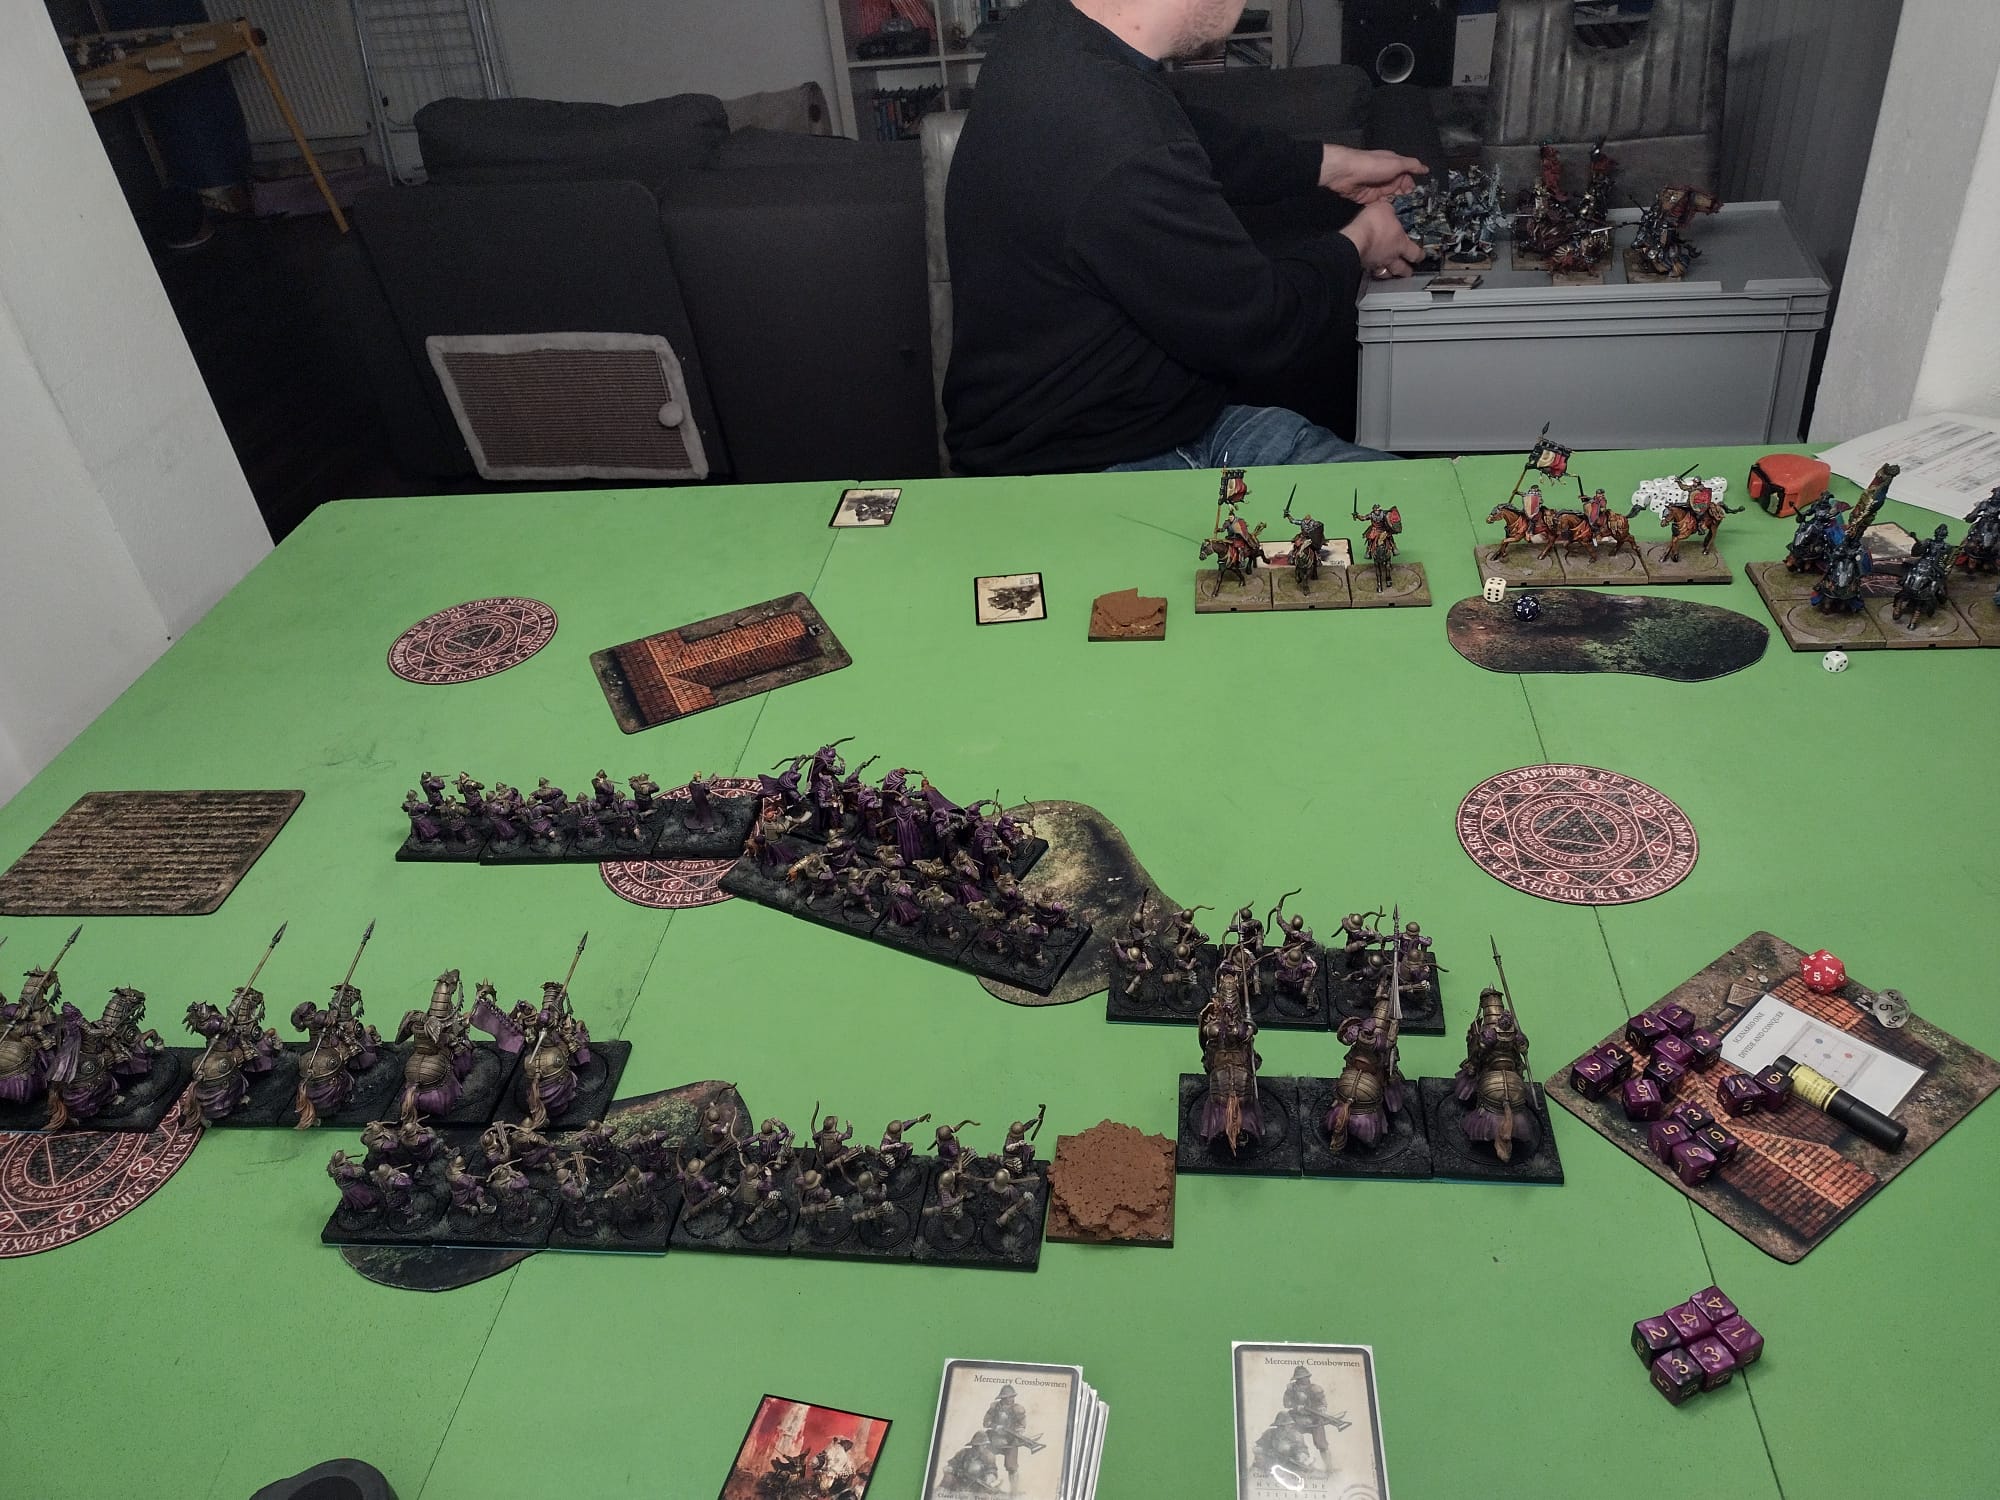
Battlereport:
The Szenaro was played with "Divide and Conquer," featuring a hill in the center, and a house and some woods on each side, significantly restricting my shooting corridors. Although the scenario seemed ideal for Goblins at first glance, it proved complicated because I couldn't score on the zones assigned to me. To score successfully, I would need to rush over half the table, which is feasible. However, in the next round, his cavalry could appear, reenacting a scene reminiscent of "The Lord of the Rings: Riders of Rohan" – I somehow wasn't thrilled about such a confrontation.
Therefore, it seemed wiser not to seek fair fights but to block him with cavalry and peasants while the crossbows and the Chapter Mage addressed the Ashen Dawn issue. In doubt, the Steel Legion should contribute to clearing up the remnants. This would only work if I stood staggered to ensure he couldn't break through anywhere. Although not optimal for the scenario, and we would have had to destroy objective markers, I decided to ignore them. Each attack against the D4 wall would be too costly.
In Round 1, unfortunately, two of my light units did not arrive, and I chose to deploy my Independent Operator (IO) with the Crossbows. This decision was made with the consideration of potentially attacking from the side with the crossbows and knights, utilizing the Rangers to push the reinforcement line further forward. Marcus intentionally kept his Squires well beyond my range for ranged attacks, as he was well aware of the risks associated with sending just one regiment into my formation. A 1:1 exchange of regiments would only favor me.
In the second round, another one of my light units appeared, along with a total of three regiments of knights. Meanwhile, my opponent only saw the arrival of the second Squire regiment and the formidable Household Knight block. I positioned three out of four characters and some militia units towards the top, ready to react with the shooters once he completed his actions. The Imperial Officer opted for "Seek new Escort" to join the Rangers and lure the poisoned cake Squires, but Marcus chose to withdraw. Unfortunately, not far enough, as I managed to land some shots on the middle Squires, turning a horse into a hedgehog with arrows and bolts. The rest of my troops marched in an orderly fashion behind the others towards the center, and I hoped that in the next round, only one regiment of Heavys would appear. This way, I could systematically dismantle them and continue scoring points in the middle zones. With one zone and consequently more zones than Marcus, I was now leading 3:0.
The third round started with a favorable turn of events as all my regiments appeared on the battlefield. Unfortunately, three Heavys also emerged on Marcus's side, while the small Household Knights were absent. However, with only 8 cards compared to my 17, I had to endure just 9 activations until my crucial units came into play. I could then prepare for an impending flank, which unfolded as planned.
At some point, both blocks of Ashen Dawn advanced on the left flank, followed by the Crimson with their Commander. I questioned whether it might be more sensible to place the Crimson in the center, but Marcus considered the risk for the riders too high and saw my attempts at blockade as penetrable. Therefore, my Chapter Mage fled first into another regiment, and I positioned the Steel Legion also centrally and a few knights further to the right. The former crossbows of the Chapter Mage advanced so far that his Crimson Tower couldn't execute a meaningful attack if the Ashen Dawn targeted the crossbows. At least, if they survived the impacts. If that didn't work out, there would be additional activations in between.
So, the plan was sufficient for the next round on the flank. I shot down a Squire pony in the middle and surprised Marcus on the right with crossbows from the flank, disrupting his large block and placing a small Household Knight unit for protection. Now, in the next round, I just had to avoid messing up my deck building, and I would undoubtedly continue holding two zones as I did now. Thus, my lead extended to 8:0.
In the fourth round, the entirety of Marcus's forces appears, and I am somewhat frustrated that he still has 10 cards. I'm hopeful that in this round, I can exchange two, maybe even three of his cards for three of mine, which would relieve a lot of pressure. While I see no threat in the center from the Squires and hope they'll perish soon, allowing me to focus on the urgent issues on the left flank, the situation on the right and left looks different.
On the right side, I simply need to bide my time, as Marcus either maneuvers for a round to reach the center with the large block or gets tied up by my crossbows and Household Knights over several rounds. Both scenarios work fine for me. Therefore, three crossbows move all the way up, followed by a regiment of knights and then a variety of characters and the rest. This allows me to either shoot at the Ashen Dawn if I initiate the attack or continue disrupting the Household Knight block. If I don't attack immediately, the next crossbows move to the position of the old ones when they fall due to impacts, giving me another round. I will undoubtedly score another 5 points, and I just have to hope that his other knights don't spoil my day.
So, the situation unfolded, and he executed token activations, which initially confused me but proved to be not so unwise. In response, I opened fire on his Ashen Dawn and the large Household Knights, strategically positioning myself until the Ashen Dawn rushed into my formation. They failed to eliminate the crossbows with their impacts, forcing them to resort to a clash. This worked in my favor, and for the time being, I left everything as it was.
In the center, the two Squire regiments now rebelled, slaughtering some of my peasants. In return, there were counterattacks from a block of knights, the Chapter Mage, and the crossbows, eliminating any Squire problems in the center. Instead, the Crimson Tower appeared there now. However, they could only reach a regiment of Rangers in the next round, and then they would be within short range of the crossbows and the Chapter Mage. Additionally, I happened to have the Steel Legion standing there, so I considered the center more than secure.
On the right flank, his massive block of Household Knights launched an attack on the crossbows, then turned to prevent my knights from getting into his rear. Subsequently, my knights engaged the front of the block, and since the crossbows had already dealt five damage earlier, another knight fell immediately, leaving the unit with only 5 hit points. Marcus felt a sense of unease, and I rejoiced as he found himself compelled to position the small Household Knights on the flank as well. Due to the water, a move-charge was not particularly appealing for them, and I hoped they would be a round too late.
With three significant options opening up for him, I tailored my deck to ensure that, in case of uncertainty, I could always strike on a side where he hadn't taken action yet, disrupting his plans. The characters, excluding the Chapter Mage, were placed fairly centrally in the deck. Three riders were positioned further up, followed by a Steel Legion, the Rangers, and the crossbows. I did not expect the Rangers to survive for too long, but I had to slow down the left flank, and he would, under no circumstances, activate the Ashen Dawn early since he already had enough issues to deal with.
In the 5th round, he activated the Commander's Supremacy. The remaining units of his knight block started the assault, causing me 7 damage after the dice rolls. This meant a dead knight and a good chance to potentially win this battle. However, before that, my Household Knights, led by Warlord, casually charged into the Crimson Tower, sending one of the killer ponies home. He didn't like that, so the Crimson from the center attacked my Rangers and naturally wiped them out. With my next knights ready, they cleverly positioned themselves just in front of the Ashen Dawn, preventing him from freeing the Crimson Tower. Thus, I would safely score alone in the next round. He attacked my Household Knights, and although I lost numerous models, I retained all four cards. Eventually, towards the end, he decided to move his small Household Knights into the zone. I overlooked this and now had to kill at least one, preferably two of them, to prevent him from scoring. However, I also had to eliminate the Crimson Tower in front of my line. Choosing not to be greedy – never a good plan – I opted to reduce the Crimson to one stand with two crossbows, the Chapter Mage, and militia, forcing a
draw with the knights in the zone. This was better than having Crimson Tower marauding in my army. However, the second militia executed a heroic charge into the flank of his knights in the zone, and then the small block with the second Household Knights and the Noble Lord struck, resulting in the fall of two riders. Thus, the zone was once again under my control, and the score was 18:0. Militia Bowmen Melee Masters ;)
.jpeg)
.jpeg)
In the 6th round, the remaining Household Knights on the left flank were shattered, and his Ashen Dawn charged the Crossbows while landing incidentally in a zone. I had anticipated this, and at least, they had no impacts due to the terrain. My Steel Legion led the counter-attack, but their 12 attacks didn't do much. When the Crimson freed themselves – causing my first Warlord to die and concede points – and then charged into the Legion, I started feeling a bit uneasy. They were only a few of those dangerous ponies, but still, one stand of Legionnaires fell. I decided to continue the prolonged battle on the right flank, and my Household Knights narrowly defeated his riders. Thus, I had also killed a Warlord, and the path to his zone was clear for me. I would securely reach it in two rounds and then score unrestricted points. This would mean I practically won if his two regiments with one knight each in the center went away. Then I could simply put my units against him on the left, continue scoring, while he only had two-point regiments left. Therefore, the Chapter Mage wished for the last Crimson in the center to disappear. The Crossbows turned, and his Household Knight slaughtered my brave peasants, only to be held accountable by my knights afterward. I still controlled the two middle zones, and Marcus possessed my far left. Thus, the score was 25:4.
In round 7, I pushed things into his face as my Legion and the remaining forces wouldn't hold out much longer. It was a bit tedious, but he couldn't catch up with me mathematically, especially since I would also bring riders into his right zone next round. When the Chapter Mage wished away the last Crimson – Fire Dart has Cleave 2 – we concluded the game.
Conclusion: In my opinion, Marcus should have placed the Ashen Dawn more centrally and opened up more fronts. This would have prevented me from using a movement trick to skip his left flank for a round. It allowed me to force him into decisions between a rock and a hard place and gradually wear down his army, despite having qualitatively better troops. This reminded me of the Echelon scenario, albeit differently, even though games with Goblins on Echelon unfold similarly. On the other hand, it once again demonstrated the effectiveness of the activation advantage against heavy-focused army lists. Especially against riders, who don't like to get bogged down and where I have enough small units to keep them busy for a round or two, preventing them from scoring.


.jpeg)


.jpeg)
.jpeg)
.jpeg)
.jpeg)
.jpeg)

Keine Kommentare:
Kommentar veröffentlichen