Since the scenarios are rolled out in Bedburg, I gave the list from Kelpie Con out of convenience. I actually wanted to play something else, but for the last four weeks I was a bit demotivated and played mostly dinosaurs and on the Thursday before the tournament I had another option to test the brave humans in Sidequest Bremerhaven:
Kelpie Con
& Bedburg [2000/2000]
Relentless Drill
== (Warlord) Imperial Officer [75]: On Your Feet, Fire
First, Aim Later
* Mercenary
Crossbowmen (3) [105]:
* Mercenary
Crossbowmen (3) [105]:
* Imperial Ranger
Corps (3) [120]:
== Noble Lord [80]: Weapon Master
* Mercenary
Crossbowmen (3) [110]: Standard Bearer
* Mercenary
Crossbowmen (3) [105]:
* Household Knights
(3) [140]: Standard Bearer
* Household Knights
(3) [140]: Standard Bearer
== (Warlord) Priory Commander (Crimson Tower) [110]:
* Order of the
Crimson Tower (3) [215]: Standard Bearer
* Order of the
Crimson Tower (3) [215]: Standard Bearer
* Order of the Ashen
Dawn (3) [240]:
* Order of the Ashen
Dawn (3) [240]:
Test [2000/2000]
The W'adrhŭn
== (Warlord) Matriarch Queen [125]: Death, Combat 1, Combat 2
* Hunters (5) [260]: Flint Knapper
* Warbred (3) [210]:
* Raptor Riders (3) [190]:
* Raptor Riders (3) [190]:
== Chieftain [200]: Famine, Death's Gaze, Violence of Action, Conquest 1, Conquest 2
* Veterans (3) [180]:
* Veterans (3) [180]:
* Blooded (5) [255]: Standard Bearer, Aberration
* Warbred (3) [210]:
My teammate was Jerome and he had an army list with him that was very different from his other stuff. No big dinosaur, no slingers... that was okay with me at first.
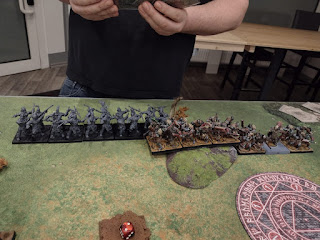
On round 1, Jerome only rolled an extra unit and I was looking forward to it, but unfortunately only the automatic regiment Crossbows appeared for me, so they marched up with my officers on the right flank while Jerome's large Hunter Block was in the middle and a regiment of Raptors on the left.
On the other hand, the raptors charge me without chants and don't kill a rider, which makes it difficult for me to work with vanguard, aim and shoot, but I break the raptors and at least hold a zone and still shoot the objective. 9:12 for the dinosaurs.
Round 4, I have the Household Knights and once Crimson Tower with Commander. Why should more heavies come when I need them right now :D
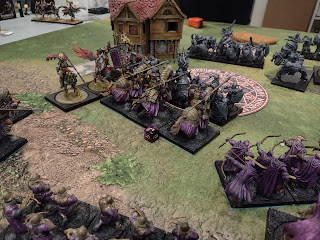
Jerome sees the initiative and now wants to completely remove me from the scenario. On the right flank, the Blooded kill the Crossbows without inspire, he collects the points for the character and goes straight to the next unit of Crossbows. His one Warbread moves into the zone and his Queen goes into the now free Warbread zone while I'm in the process of shooting that one annoying raptor and protecting my crossbows from the second raptors with Noble on the left flank. Overall everything is going okay, but I'm forced to charge the Blooded with the Ashen Dawn, because they would otherwise charge my Crimson Tower next round and I urgently need that so that the field doesn't collapse completely. I don't like tackling Lethal Demise regiments with knights at all because that usually ends in a bad exchange and I would give Jerome all the zones because the veterans run through on the left side. After a short measurement I don't see any other sensible option and despite blessed I almost lose an Ashen Dawn. As a result I don't hold any zone and Jerome holds all four and we go to 11:23
Round 5, Supremacy for Hardend and finally the cavalry's horns sound far away. Jerome calculates the whole thing and explains to me that I will only get one zone this round and then next round he will just somehow hold it to win. He starts, the raptors make a charge against my Household Knights, kill them and thereby block the other Household Knights. The now free Veterans kill the Crossbows in front of them and I'm surprised he didn't do the right flank with the Warbread beforehand. But in retrospect that was smart because it kept me out of the zone and there was no reason for my Crimson Towers to activate early. So the middle Warbread come as victims, eat the Rangers and are killed by the Crimson Tower in return. My first activation was the Ashen Dawn on the right flank and they shredded the Warbread with Blessed and I assumed that the Hunters would fire something at the Ashen Dawn. Instead, the Fanatic became Dead and one rider survived with two lives. So again I held no zone and Jerome held three. My back was slowly falling on ice but finally the cavalry marched up to support me. In the middle Ashen Dawn in front of the Crimson Tower and on the right the second Crimson Tower. Both in charge clash reach to all relevant.11:32
Round 6, Jerome starts and the raptors go into the Ashen Dawn's flank to rescue his veterans. My Crimson Towers slay the Hunters with Charge Clash and the Queen gets the last Ashen Dawn in Die Fighting. Thanks to the Raptors my options are limited and due to the point gap the Crossbows were moved closer together so the Lord could jump over in a few turns and I could hold all the zones. So the second Crimson Towers turned and slew the Veterans and at some point the Raptors also went to flank the Ashen Dawn. This meant that I finally had two zones again and Jerome only had one regiment of veterans, which withdrew to prevent me from getting into his far left zone the next round. 17:34
Round 7 and the commander switched to Ashen Dawn to kill the Veterans. Of course that didn't work and so I had to make do with two zones because I was half an inch short of three zones. This took us to 21:36 and on Round 8 I finally wiped out the rest of the W'adrhŭn and slowly moved up to 30:36. Since I scored 11 points in each of the last two rounds, I was just able to bring home a score of 42:36.


.jpeg)

.jpeg)

.jpeg)
.jpeg)
.jpeg)

Keine Kommentare:
Kommentar veröffentlichen